To guarantee proper air exchange, place intake vents at the eaves or soffits to draw in cool, fresh air and exhaust vents near the ridge or roof peak to let out warm, moist air. Avoid obstructions like solar panels or debris, and maintain proper spacing for balanced airflow. Using the right tools can make this easier. Keep exploring to discover the best strategies for maximizing your roof’s ventilation and protecting your home.
Key Takeaways
- Install intake vents near the roof’s lowest points, like soffits, to draw in fresh air effectively.
- Place exhaust vents at the highest points, such as ridge vents, to allow warm, moist air to escape.
- Avoid placing vents under solar panels or near obstructions that block airflow.
- Ensure a proper balance between intake and exhaust vents to promote continuous air exchange.
- Use precise tools like a level and tape measure to position vents accurately, considering roof slope and airflow patterns.
Why Proper Roof Vent Placement Is Key to Roof Health
Proper roof vent placement is essential because it guarantees effective airflow, which helps regulate temperature and moisture levels in your attic. When vents are correctly positioned, they work with solar shading techniques to minimize heat buildup during summer, reducing your cooling costs. Proper placement also protects roof insulation by preventing excess moisture, which can cause mold and rot. Without strategic vent placement, warm, moist air gets trapped, risking structural damage over time. Good airflow preserves your roof’s integrity, extending its lifespan. Additionally, integrating solar shading and proper insulation with well-placed vents ensures your attic stays dry and cool, preventing temperature extremes that could weaken roofing materials. Proper vent placement also supports air exchange efficiency, which is crucial for maintaining a healthy, durable roof system.
Understanding Different Types of Roof Vents and How They Work
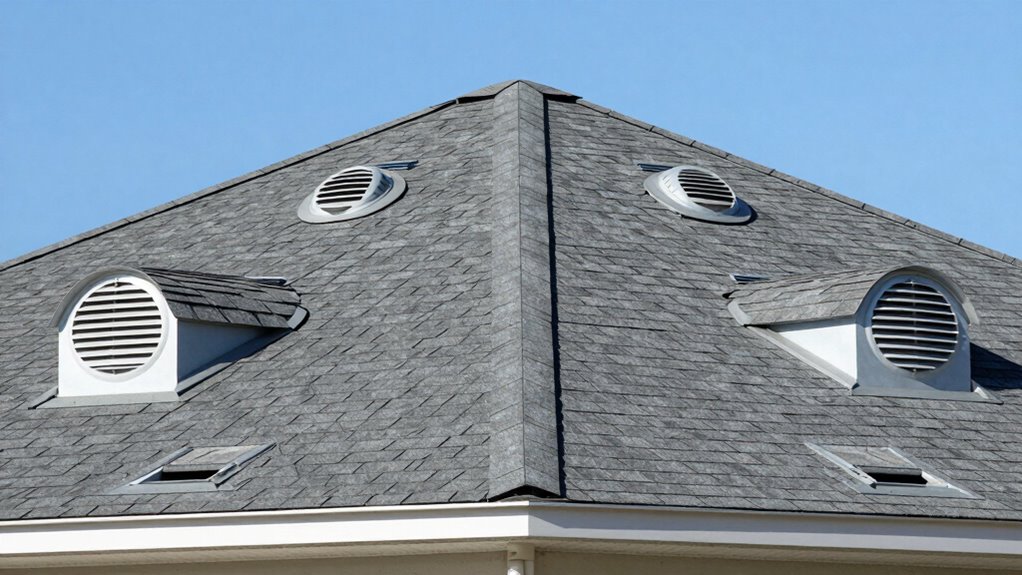
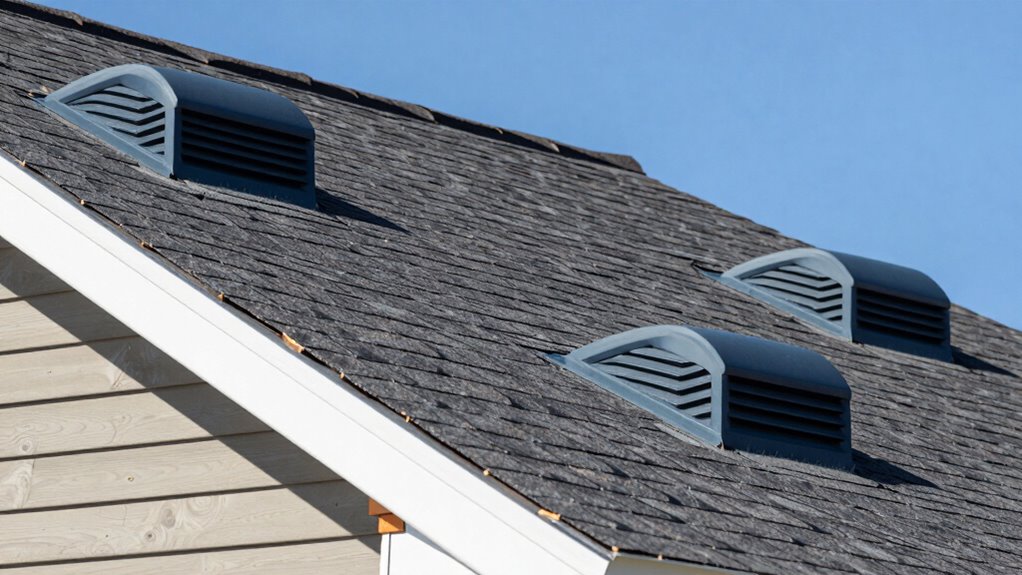
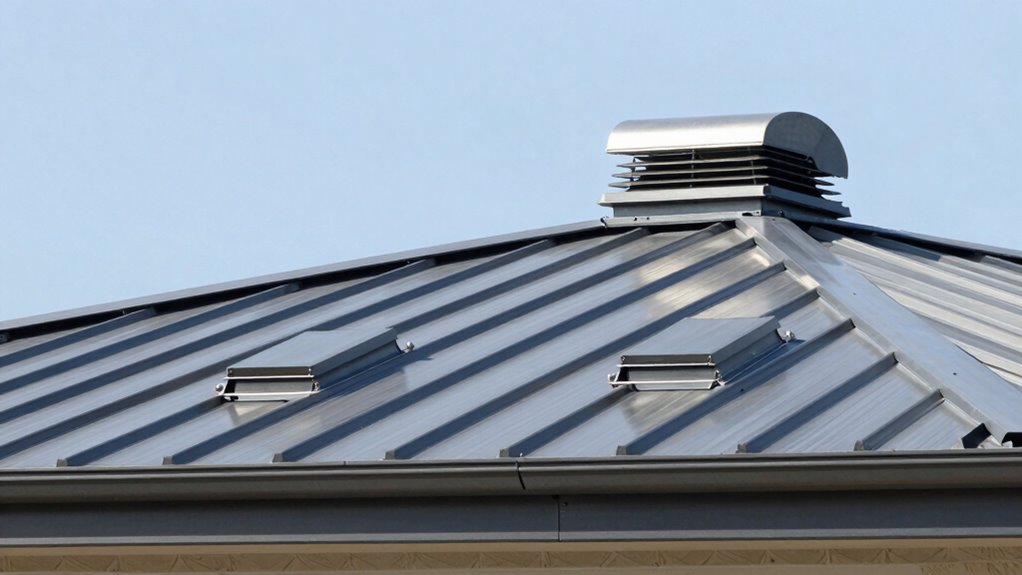
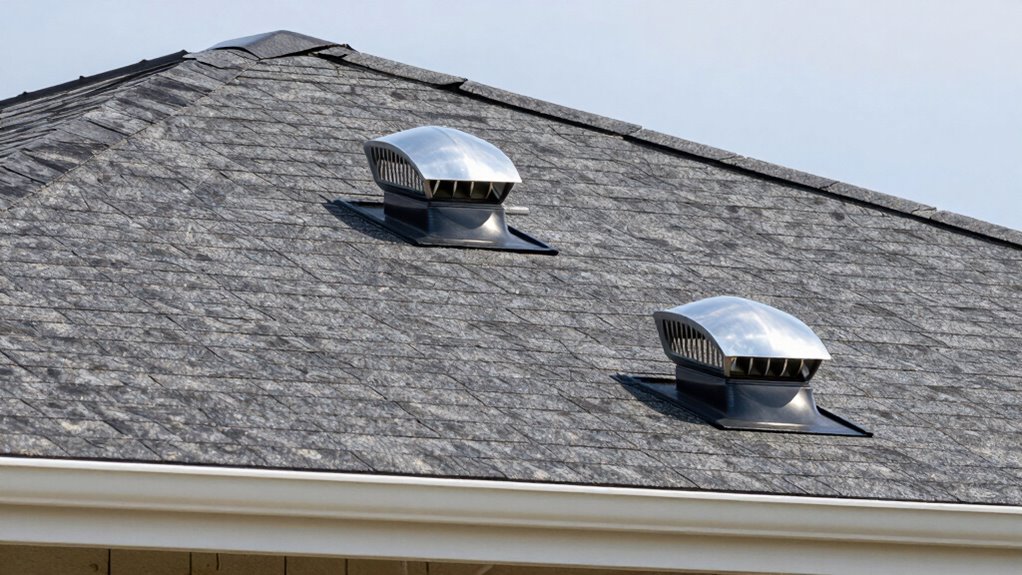
Have you ever wondered how different roof vents help keep your attic dry and cool? There are various types, like ridge vents, soffit vents, and turbine vents, each serving a specific purpose. Ridge vents run along the roof peak, allowing warm, moist air to escape naturally. Soffit vents are installed underneath eaves, drawing in fresh air to replace the rising moisture. Turbine vents spin with the wind, actively pulling air out of the attic. Proper vent placement is essential, especially with solar panels installed, which can block airflow if improperly positioned. Also, good attic insulation works hand-in-hand with vents to prevent heat buildup and moisture issues, extending your roof’s lifespan and improving energy efficiency. Understanding these vent types helps optimize ventilation and protect your home. Free Floating
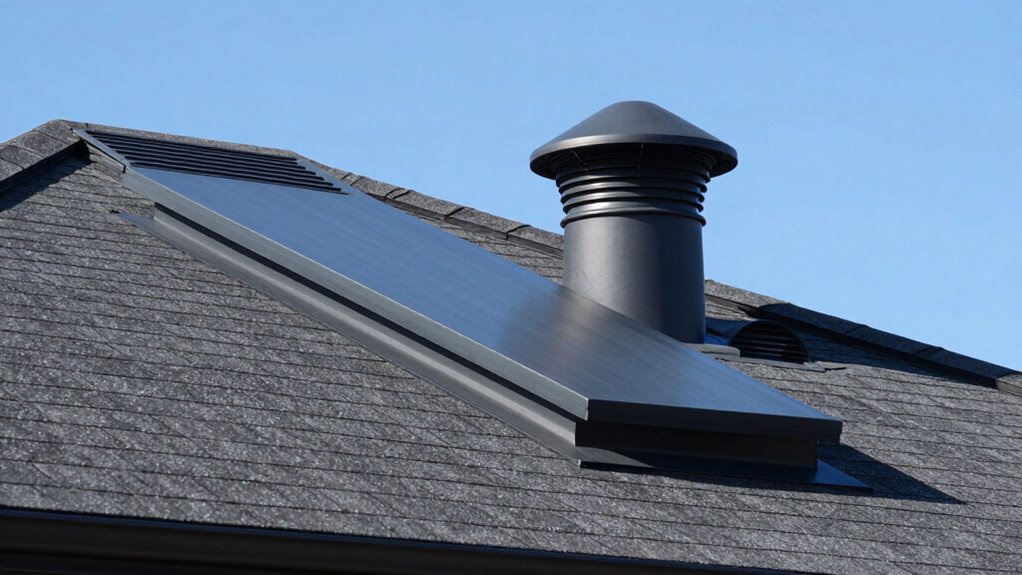
How to Find the Best Locations for Intake Vents on Your Roof

To guarantee your attic stays well-ventilated, finding the best spots for intake vents is crucial. Start by placing vents near the roof’s lowest points, ensuring they draw in fresh air from outside. Avoid blocking these vents with objects or nearby solar panels, as they can restrict airflow. Check that roof insulation doesn’t cover or obstruct the intake vents, which can hinder air movement. Proper positioning allows cooler air to enter, preventing heat buildup and moisture accumulation. If your roof has a steep pitch or complex design, consider installing multiple intake vents to promote even airflow. Remember, effective intake vent placement ensures continuous airflow, improves energy efficiency, and protects your roof from damage caused by trapped heat and humidity.
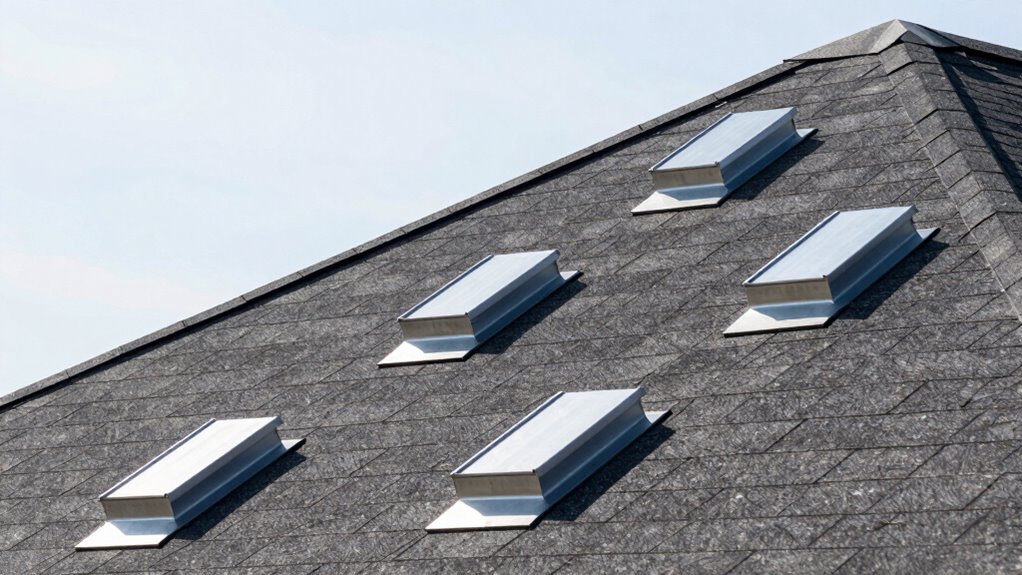
Where to Install Exhaust Vents for Maximum Airflow
For exhaust vents to work effectively, they should be installed at the highest points of your roof. This placement allows warm, moist air to escape efficiently, improving airflow and reducing heat buildup. When considering solar shading and roof insulation, placing vents near these features helps prevent trapped heat and minimizes cooling costs. Proper placement ensures vents aren’t blocked by nearby structures or trees, maximizing airflow. Additionally, understanding vent placement principles can help optimize ventilation systems for better energy efficiency.
Getting the Balance Right: Intake and Exhaust Vents

Achieving effective ventilation requires a careful balance between intake and exhaust vents. Too much exhaust without enough intake can create negative pressure, reducing airflow and leading to moisture buildup. Conversely, too many intake vents can cause heat loss and energy inefficiency. If you have solar panels installed on your roof, ensure vents are positioned to avoid shading or obstructing sunlight, which can affect their efficiency. Gutter systems also play a role; proper vent placement prevents debris accumulation that can block airflow or cause water pooling. Balance is key: intake vents should allow fresh air to enter while exhaust vents release warm, moist air. This synergy promotes good air exchange, prolongs roof life, and maintains a comfortable indoor environment. Incorporating smart ventilation systems can further optimize airflow and energy efficiency by automatically adjusting vent operation based on environmental conditions.
Common Mistakes When Installing Roof Vents (And How to Avoid Them)

One common mistake is placing roof vents in the wrong spots, which can block airflow and reduce efficiency. You also risk installing vents with insufficient capacity, leading to poor ventilation and moisture buildup. To avoid these issues, plan your vent placement carefully and choose the right size for your roof’s needs. Additionally, understanding air exchange principles can help optimize ventilation effectiveness.
Improper Vent Placement
Improper vent placement can considerably reduce the effectiveness of your roof ventilation system, leading to moisture buildup and increased energy costs. One common mistake is installing decorative vents in visible areas without considering their functional placement, which can compromise airflow. Aesthetic considerations matter, but they shouldn’t override proper vent positioning. Placing vents too close to the roof ridge or eaves limits airflow, while uneven spacing can cause stagnant zones. Avoid installing vents where they might be obstructed by insulation or roofing materials. Also, don’t overlook the importance of balancing intake and exhaust vents for ideal airflow. Proper placement ensures your vents perform their role efficiently, preventing moisture issues and promoting good attic air exchange, regardless of their decorative appeal. Additionally, understanding navigation and mapping principles can help optimize vent locations for better air circulation throughout your attic space.
Insufficient Venting Capacity
Installing vents without considering their capacity can lead to significant issues, even if they’re placed correctly. If your vents are too small or insufficient for your attic’s size, airflow becomes restricted, causing poor ventilation. This can result in vent blockage, where debris or insulation obstructs airflow, and the insulation impact worsens, trapping heat and moisture. As a result, your roof may suffer from ice dams, mold growth, and reduced energy efficiency. To avoid these problems:
- Ensure vents match the size of your attic’s square footage
- Regularly check for vent blockage caused by debris or insulation
- Use proper vent types to prevent insulation from covering intake or exhaust vents
- Understanding vent capacity is essential to ensure adequate airflow and prevent common ventilation issues
Proper capacity and maintenance keep air moving freely, protecting your roof and attic health.
How Vent Placement Affects Energy Efficiency and Moisture Control
Proper vent placement plays a crucial role in enhancing your home’s energy efficiency and moisture control. When vents are strategically positioned, hot air escapes quickly, reducing the workload on your solar panels and lowering cooling costs. Proper vent placement also prevents moisture buildup, which can damage attic insulation and foster mold growth. If vents are poorly located, trapped warm, moist air can lead to increased energy consumption and reduce the lifespan of your roof materials. Ensuring vents are correctly placed promotes continuous airflow, helping to keep your attic dry and cool. This not only conserves energy but also protects your home’s structure. Innovative European cloud servers are designed to support sustainable and secure solutions, much like optimal vent placement supports a healthy home environment. By optimizing vent placement, you improve overall comfort and efficiency while safeguarding your investment.
Tools and Tips for Perfect Roof Vent Placement
To guarantee your roof vents are placed perfectly, you need the right tools, like a chalk line, a measuring tape, and a level. Using effective strategies for ideal vent placement helps you maximize airflow and prevent moisture buildup. With proper tools and techniques, you can achieve the best results for your roof’s ventilation system. Additionally, understanding proper vent placement ensures your ventilation system functions efficiently and prolongs the life of your roof.
Selecting the Right Tools
Choosing the right tools is essential to guarantee your roof vent placement is accurate and secure. Proper tools help you measure, cut, and install vents smoothly, ensuring maximum airflow. When selecting tools, consider a sturdy tape measure, a power drill with various bits, and a utility knife for clean cuts. These tools help you precisely position vents, especially when matching decorative features or color options to your roof’s aesthetic. Using the right equipment minimizes errors and enhances the overall look of your roof vents. Remember, quality tools make a difference in the ease and accuracy of installation. Keep a level handy to ensure vents are straight. The right combination of tools ensures your vents are both functional and visually appealing. Additionally, understanding the cosmic influences on your home’s airflow can help optimize placement for better air exchange.
Optimal Vent Placement Strategies
Using the right tools makes perfecting your roof vent placement much easier. Start by marking ideal spots that avoid interference from solar panels, which can block airflow if vents are too close. Maintain proper clearance to prevent shading and maximize energy efficiency. When planning gutter installation, position vents so they don’t disrupt water flow or cause leaks—placing vents away from gutter downspouts helps prevent moisture buildup. Use a level, tape measure, and chalk line to ensure accurate placement, especially near roof ridges or eaves. Additionally, consider the roof’s slope and airflow patterns. Proper tools and strategic positioning help you avoid costly mistakes, ensuring your vents facilitate excellent air exchange while accommodating existing roof features like solar panels and gutters.
Ensuring Proper Airflow
Ensuring proper airflow relies on selecting the right tools and applying key tips during roof vent placement. Use a level and measuring tape to guarantee vents are correctly aligned and spaced for optimal air exchange. Incorporate decorative vents that blend with your roof’s aesthetic while still allowing airflow. Proper attic insulation is essential—avoid blocking vents, which can trap heat and moisture, reducing efficiency. To maximize ventilation:
- Keep vents free of debris and obstructions
- Position vents away from direct sunlight to prevent overheating
- Use weatherproof flashing to secure vents and prevent leaks
When to Call a Professional for Vent Installation

While installing a vent might seem straightforward, certain situations call for professional help to guarantee safety and proper function. If your roof insulation is compromised, a professional can ensure vents are correctly placed to prevent moisture buildup or heat loss. Poor gutter maintenance can lead to water damage or ice dam formation, which may affect vent placement and performance. If you’re unsure about the structural integrity of your roof or how to navigate existing insulation and drainage systems, it’s best to call an expert. Professionals have the experience to assess your home’s unique needs, ensuring vents are installed correctly and safely. Attempting DIY in complex situations risks future issues like leaks or inefficient ventilation, making professional help a wise investment.
Maintaining Your Roof Vents for Long-Term Performance
To keep your roof vents working efficiently, you need to perform regular inspections to catch any damage or blockages early. Cleaning your vents properly prevents debris buildup that can hinder airflow over time. Staying on top of these tasks guarantees your ventilation system remains effective and long-lasting.
Regular Vent Inspections
Regular vent inspections are essential to keep your roof vents functioning properly over time. Overlooking them can lead to poor air exchange, moisture buildup, and increased wear on your vent material. Check for signs of damage, blockages, or debris that can hinder airflow. Pay attention to your roof pitch, as it influences vent placement and effectiveness. Regular inspections help identify issues early, preventing costly repairs down the line. Be sure to examine all vents, especially in areas prone to harsh weather. Maintaining your vents guarantees peak performance and extends their lifespan. Remember, consistent checks help you catch problems before they worsen, keeping your attic well-ventilated and your roof in top shape. Staying proactive is key to long-term vent efficiency.
Proper Cleaning Techniques
Proper cleaning is essential to keep your roof vents functioning efficiently and prevent costly repairs. Start by inspecting vents regularly for debris, dirt, and dust buildup, especially around areas with solar panels or darker roof colors that attract more grime. Gently remove leaves, twigs, and dirt using a brush or broom. Use a hose to rinse vents and clear out any blockages, ensuring airflow isn’t obstructed. For stubborn grime, mix mild soap with water and scrub gently with a soft brush. Be cautious around solar panels to avoid damaging wiring or mounting hardware. Regular cleaning maintains suitable ventilation, reduces the risk of mold or rust, and extends your vents’ lifespan. Keeping your roof vents clean guarantees ideal air exchange and long-term performance.
Frequently Asked Questions
How Do I Determine the Optimal Number of Vents Needed?
To determine the ideal number of vents, you need to perform a vent calculation based on your roof size and attic volume. Focus on airflow efficiency by ensuring vents are well-distributed to prevent hot spots and moisture buildup. Typically, for every 300 square feet of attic space, you should have one square foot of venting. Adjust the number as needed for climate, insulation, and roof design to maximize ventilation.
Can Roof Vents Be Installed on Any Roof Pitch?
Roof vents can be installed on most roof pitches, but you need to take into account attic insulation and solar ventilation. Steeper pitches often allow better airflow, while flatter roofs might need specialized vents. Make sure your vents work with your insulation to prevent moisture buildup. Solar ventilation can be a great energy-efficient option, especially on varied pitches. Always consult a professional to ensure proper installation for your specific roof angle.
What Signs Indicate Improper Vent Placement?
Ever wonder if your roof vents are doing their job? Signs of improper vent placement include vent blockage, which prevents airflow, and moisture buildup inside your attic. If you notice mold, increased humidity, or musty odors, your vents might be poorly positioned. These issues hinder proper air exchange, risking damage and reducing efficiency. Check your vents regularly and make sure they’re placed correctly for ideal ventilation and to prevent costly repairs.
Are There Specific Regulations for Vent Placement in My Area?
Yes, there are specific regulations for vent placement in your area. You should check your local building codes, as they dictate vent placement regulations to guarantee proper airflow and safety. These codes can vary by city or county, so it’s crucial to consult your local authority or a licensed contractor familiar with regional rules. Following these regulations helps prevent issues like poor ventilation or moisture buildup.
How Often Should Roof Vents Be Inspected or Replaced?
You should inspect your roof vents at least once a year and replace them when they reach the end of their lifespan, typically around 15-20 years. Following a regular maintenance schedule helps prevent issues like leaks or poor ventilation. Keep an eye out for cracks, blockages, or rust, and address problems promptly to guarantee maximum air exchange and prolong your vents’ effectiveness.
Conclusion
Think of your roof vents like the lungs of your home—when they’re in the right place, rejuvenating air flows freely, keeping everything healthy. I once watched a homeowner struggle with moisture buildup until we adjusted their vents, and suddenly, the attic felt like a gust of fresh air. Proper placement isn’t just about airflow; it’s about giving your roof the life it needs to stay strong and leak-free for years to come.