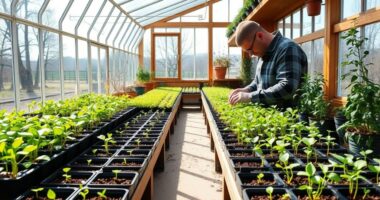
To prevent transplant shock when moving plants early in spring, use the two-step method. First, transplant seedlings into larger containers to give roots space to grow. After a few days, gently plant them outdoors, making sure soil is moist and well-prepared. This approach minimizes root disturbance and helps plants adjust gradually to their new environment. Keep soil damp and monitor plant health to ensure strong growth—continue with these steps to learn more about successful transplanting.
Key Takeaways
- Transplant seedlings into 3-4 inch containers early spring to develop strong roots before outdoor placement.
- Use a staged approach: transplant into containers first, then move outdoors after a few days to reduce shock.
- Handle roots gently and keep them moist during transplanting to minimize root damage and stress.
- Proper soil preparation with organic matter and thorough watering supports healthy establishment.
- Mulch and monitor plants post-transplant to retain moisture, prevent pests, and promote resilient growth.
Why Transplanting Early in Spring Can Boost Your Garden

Transplanting early in spring can give your garden a significant head start on the growing season. By moving plants outside sooner, you allow them to develop roots and foliage before the weather gets too warm. To guarantee successful transplanting, enrich your soil with amendments like compost or organic matter, which improve drainage and provide essential nutrients. Healthy soil supports strong plant growth and reduces stress during the transplant process. Additionally, early planting helps you stay ahead of pests by establishing healthy, resilient plants before infestations peak. Proper pest management strategies, such as companion planting or natural repellents, can further protect your crops. Using soil amendments can enhance plant health and resilience during early transplanting. Overall, early spring transplanting with well-prepared soil and pest control sets the stage for a productive, vigorous garden.
What Is Transplant Shock and How It Affects Your Plants
When you move plants from indoor starts or greenhouse conditions to your outdoor garden, they often experience a period of stress known as transplant shock. This stress occurs because their roots may suffer root damage during the transplant process, making it harder for the plant to absorb water and nutrients. Improper transplant timing can worsen this effect, as moving too early or too late exposes plants to unfavorable conditions. As a result, your plants might wilt, show slowed growth, or even die if they don’t adapt quickly. Transplant shock is a natural response to disturbance, but understanding how root damage and timing influence it helps you take steps to minimize stress. Proper planning ensures your plants settle in smoothly and thrive. Maximize Your Truck Bed’s Potential by using the right tools and techniques to transport and protect your plants during this critical period.
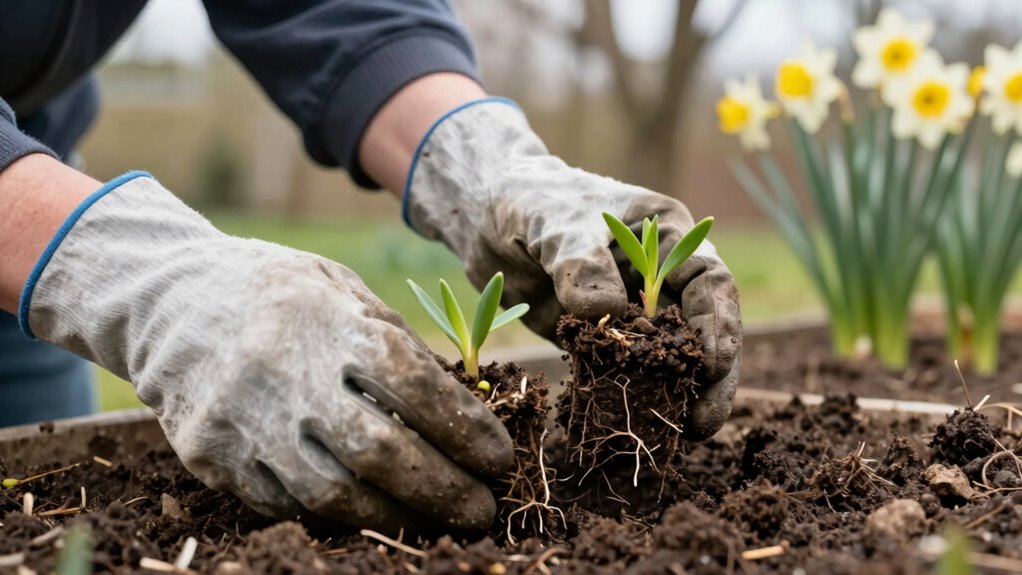
Introducing the Two-Step Transplanting Method for Gentle Moving

The two-step transplanting method helps you preserve root integrity and reduce stress on your plants. By carefully loosening and moving them, you give your plants a smoother shift to their new spot. This gentle approach guarantees healthier growth and less shock after transplanting. Incorporating proper device security measures during the process can further protect your plants from potential threats.
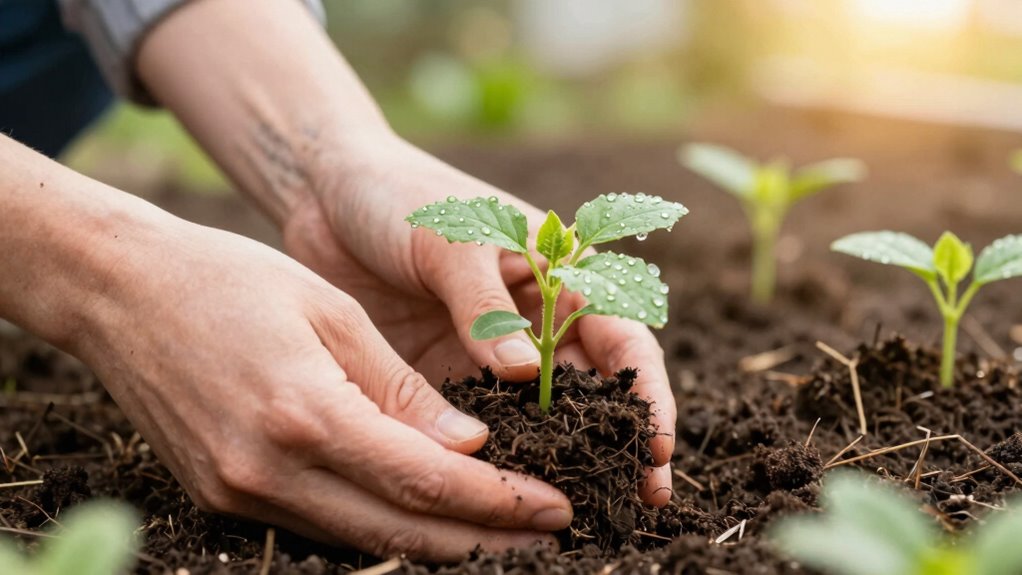
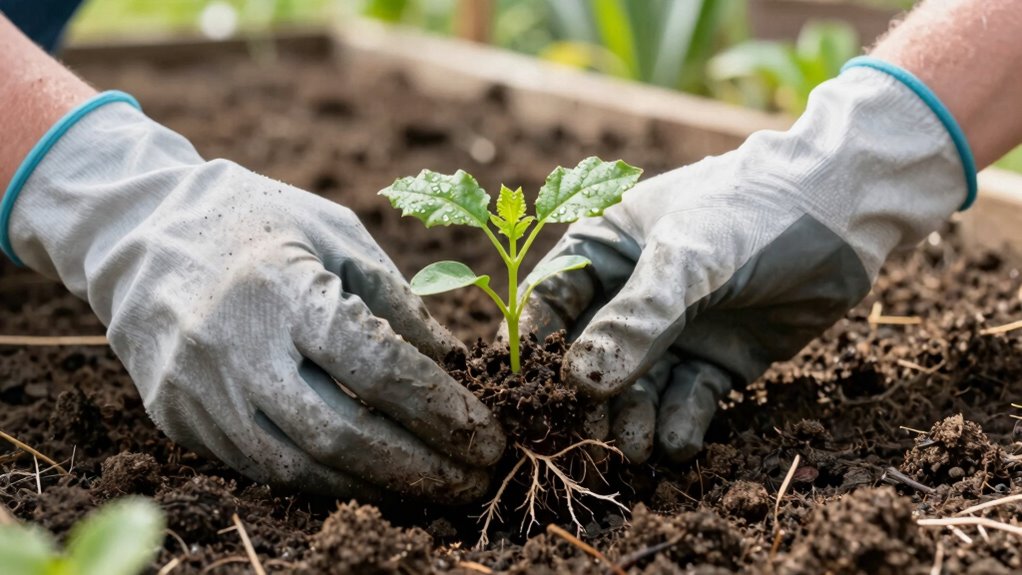
Preserve Root Integrity
To successfully preserve root integrity during early spring transplanting, you’ll want to adopt the two-step transplanting method. Proper root protection begins with careful handling and precise transplant timing, minimizing damage. This method ensures roots stay healthy and intact, reducing shock. Here’s what to focus on:
- Gently loosen soil around the root ball without disturbing the root structure.
- Keep roots moist and protected during extraction and transport.
- Transplant early enough in spring to avoid root dehydration but after the soil warms sufficiently.
- Plant at the same depth to prevent root stress and encourage quick establishment.
- Ensuring optimal color accuracy during planting can promote healthy growth and vibrant foliage.
Adhering to this technique helps maintain root integrity, ensuring your plants adapt smoothly and thrive in their new location. Proper timing and gentle handling are key to successful early spring transplanting.
Minimize Plant Stress
Minimizing plant stress during early spring transplanting starts with handling the plant gently throughout the entire process. Carefully loosen the soil around the roots and avoid damaging them, which helps reduce shock. When transplanting, consider companion planting to promote pest prevention naturally, which lessens the need for chemical interventions that could stress plants further. Keep the roots moist and work quickly to prevent dehydration. Using the two-step method allows you to move the plant gradually, giving it time to adjust to its new environment. This gentle approach not only minimizes physical stress but also encourages healthier growth. Proper plant care during and after transplanting supports recovery and resilience. By being attentive and cautious, you help your plants recover faster, thrive, and resist pests more effectively, setting the stage for a successful spring garden.
How to Prepare Your Plants and Garden for Transplanting
Before transplanting, make sure your soil is properly prepared by loosening it and adding organic matter to boost nutrients. Keep your plants well-watered in the days leading up to the move to reduce stress and ensure healthy roots. Properly preparing your garden now sets the stage for a smooth changeover and thriving plants. Additionally, consider reducing screen time to foster a more mindful connection with your garden and enhance your overall gardening experience.
Soil Preparation Techniques
Preparing your soil properly is essential to give your transplanted plants the best start. Start by loosening the soil to improve drainage and root growth. Next, incorporate soil amendments such as compost or organic matter to boost fertility. Then, test the soil’s pH and adjust it for optimal plant health through pH balancing techniques. Additionally, make certain the soil has a balanced texture, avoiding compaction or overly sandy areas. Finally, clear out weeds or debris that could compete with your plants. Proper soil preparation creates a stable environment, minimizes transplant shock, and promotes healthy establishment. By paying attention to these key steps, you’ll set your plants up for a successful transition into their new spring home. Exploring diverse herbal traditions can also inspire natural soil enhancements that support plant vitality.
Proper Watering Practices
To guarantee your transplanted plants establish quickly and thrive, proper watering practices are essential. Develop a consistent watering schedule that keeps the soil evenly moist without waterlogging. Before transplanting, thoroughly water your plants to boost moisture retention in the root zone. After transplanting, water deeply to settle the soil around the roots and reduce transplant shock. Avoid frequent shallow watering, which can dry out roots and hinder growth. Instead, aim for deep, infrequent watering sessions that encourage strong root development. Keep an eye on soil moisture levels, especially during warm or windy days, and adjust your watering accordingly. Proper moisture retention supports healthy root growth, helping your plants adjust smoothly to their new environment and ensuring a successful transplant. Utilizing watering appliances that deliver consistent, even moisture can further improve your watering efficiency.
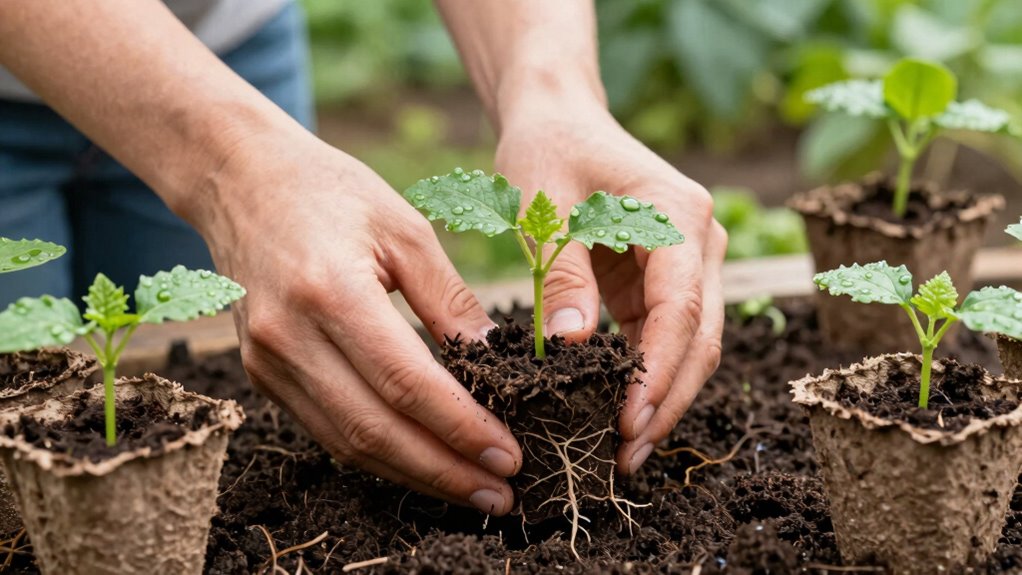
How to Implement the Two-Step Transplant in Your Garden

Implementing the two-step transplant method can substantially improve your garden’s success rate when moving seedlings outdoors. First, prepare by understanding root pruning and timing considerations.
- Root Pruning: Gently trim the roots during the initial stage to encourage a healthy, compact root system, reducing transplant shock.
- Timing Considerations: Transplant when seedlings are sturdy but before they become root-bound, typically a week before the final outdoor move.
- First Stage: Move seedlings to a protected, semi-shaded location, allowing roots to recover from pruning.
- Second Stage: After a few days, transplant them fully outdoors, ensuring the soil and weather are suitable.
Being aware of the plant’s growth stage and environmental factors can further enhance transplant success. pinball machines
Post-Transplant Care Tips for Strong, Healthy Growth
Once you’ve transplanted your seedlings, providing proper post-transplant care is essential to promote strong, healthy growth. Water thoroughly to settle the soil and reduce transplant shock. Mulch around plants to retain moisture and regulate temperature. Incorporate companion planting to naturally deter pests and improve growth, such as planting basil near tomatoes. Regularly inspect for pests and manage them early with organic methods like neem oil. To visualize, consider this table:
| Care Step | Purpose |
|---|---|
| Water and mulch | Maintain moisture, prevent shock |
| Companion planting | Enhance growth, reduce pest issues |
| Pest management | Protect plants from damage, promote health |
Additionally, understanding transplant shock can help you take preventive measures to minimize stress on your plants. Consistent care guarantees your seedlings flourish and develop into vigorous plants.
Frequently Asked Questions
What Are the Best Plant Types for Early Spring Transplanting?
You should choose plant types like broccoli, cabbage, lettuce, and kale for early spring transplanting. These greens have good plant compatibility and tend to develop strong root systems quickly, making them ideal for the two-step transplant process. By selecting hardy, fast-establishing plants, you give them a better chance to thrive with minimal shock, ensuring healthy growth as they adapt to their new outdoor environment.
How Do Weather Conditions Influence the Success of Early Transplants?
Weather conditions greatly influence your success with early transplants. If frost risk remains high, your plants may suffer damage, so wait for milder nights. Wind exposure can also stress your transplants, causing dehydration or root disturbance. Protect your plants with windbreaks or covers, and choose days with stable, warm weather to minimize shock. Monitoring forecast patterns helps you time your transplanting for ideal survival.
Can the Two-Step Method Be Used for Indoor Seedlings?
Yes, you can use the two-step transplant technique for indoor seedlings, but it’s a game of patience. Imagine gently easing your seedlings from their cozy containers, mimicking outdoor conditions step-by-step. This method minimizes shock, giving your indoor seedlings a smoother progression. Carefully follow the process, and you’ll see stronger, healthier plants ready to thrive when moved outdoors. It’s all about controlled, mindful transplanting that makes a difference.
What Are Common Mistakes to Avoid During Early Spring Transplanting?
You should avoid overwatering issues and improper spacing when transplanting early spring seedlings. Overwatering can cause root rot and weaken plants, so water only when the soil feels dry. Proper spacing guarantees roots have room to grow and prevents disease. Also, handle seedlings gently, and don’t transplant during extreme weather. Taking these precautions helps your plants establish quickly and reduces transplant shock, leading to healthier, more vigorous growth.
How Does Soil Preparation Differ for the Two-Step Transplant Process?
Did you know that properly prepared soil can boost transplant success rates by up to 50%? For the two-step transplant process, you should start by enriching your soil with amendments like compost to improve fertility. Make certain your soil has good moisture retention, so roots stay hydrated during planting. This preparation helps the young plants establish quickly and reduces transplant shock, making your garden thrive early in the season.
Conclusion
By embracing the gentle art of the two-step transplanting method, you give your plants a graceful start to their new home. Patience and care now will nurture resilience and vibrant growth later. Remember, a delicate touch often yields the most beautiful results—sometimes, the quietest steps lead to the strongest roots. Trust in your nurturing hands, and your garden will flourish as a monument to your thoughtful tending.