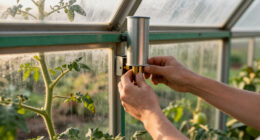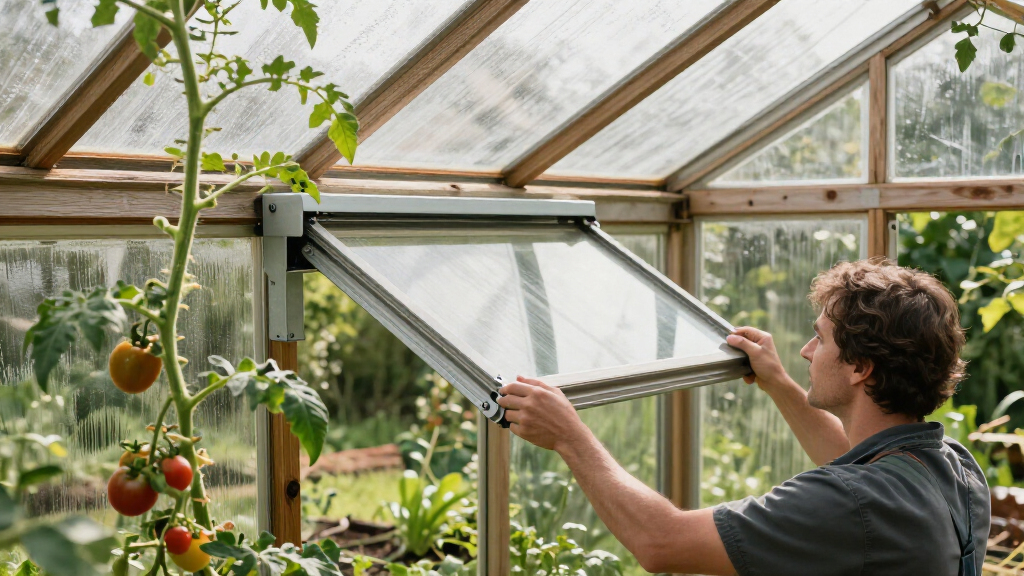

Fit and adjust an automatic greenhouse vent opener so a roof or side vent responds to temperature changes without manual operation. This guide is for greenhouse owners with basic hand-tool skills; allow 45-90 minutes for installation and testing. Most openers use a wax-filled cylinder to extend a piston as it warms, though bracket shapes and fitting instructions vary by model.

Get garden gear delivered free — and shop member deals
- Fast, free delivery on millions of items
- Access to Prime Big Deal Days deals on October 6–7
- Prime Video, Amazon Music and more included

2-Pack Solar Automatic Greenhouse Window Opener
- ✔ Pack count: 2
- ✔ Material: Aluminum alloy
- ✔ Color: Black

2-Pack Automatic Greenhouse Vent Opener with Dual Springs
- ✔ Pack size: 2 openers
- ✔ Spring design: Dual spring
- ✔ Lifting capacity: Up to 30 lbs

Automatic Greenhouse Window Opener, 2-Pack
- ✔ Pack contents: 2 window openers, clamps, and screws
- ✔ Material: Galvanized steel
- ✔ Spring design: Dual spring
Difficulty: Beginner | Time: 45-90 minutes
What You’ll Need
Tools & Materials:
- Automatic opener kit with cylinder, piston, brackets, and supplied fasteners
- Screwdriver or spanner that fits the fasteners
- Tape measure or ruler
- Stable step ladder if the vent is overhead
- Manufacturer’s installation instructions
Knowledge:
- Basic hand-tool use
- Ability to identify the vent frame and the fixed greenhouse frame
Check that the opener is rated for your vent’s size and weight. Confirm that its brackets suit your greenhouse frame and that the vent moves freely by hand. Choose a mild day if possible; extreme heat or cold can affect adjustment and testing.
2-Pack Solar Automatic Greenhouse Window Opener
This is our best all-around choice because it pairs two openers with a dual-spring design rated for up to 30 pounds of thrust. For a greenhouse with compatible windows, automatic heat response can help open vents as temperatures rise and close them as conditions cool, reducing the need to adjust each vent by hand. Its corrosion-resistant aluminum alloy construction also makes it a more convincing outdoor fit than an unspecified metal body. Compared with the second pick, however, this listing gives less guidance about maximum vent travel and opening behavior, so owners planning around a specific clearance should favor that model’s stated 18-inch reach. The 15–25°C operating range is useful context, but buyers should verify the window setup and not treat that range as a guarantee of a particular temperature inside the greenhouse.The package includes clamps and screws, which helps make the purchase more complete, though hardware alone cannot resolve mismatched mounting points. We’d choose it for a two-vent installation where sturdy outdoor materials and straightforward automatic operation are the priorities. Skip it if you need a precisely specified opening distance or have unusually heavy, awkwardly hinged, or incompatible windows; the stated thrust figure does not replace a fit check.
Pros:
- Two openers are included for fitting more than one vent.
- Dual springs provide up to 30 pounds of stated thrust.
- Corrosion-resistant aluminum alloy is intended for outdoor use.
- Clamps and screws are included.
Cons:
- Maximum vent travel is not stated in the supplied details.
- The specified operating range may not suit every greenhouse climate or vent schedule.
- Compatibility depends on the window and mounting arrangement.
Best for: Greenhouse owners fitting two compatible windows who prioritize dual-spring lifting force and corrosion-resistant aluminum.
Not ideal for: Buyers who need a stated maximum opening distance or whose windows have unusual weight, hinges, or mounting points.
Bottom line: A strong general-purpose two-window set when its operating range and mounting arrangement fit your greenhouse.
“A strong general-purpose two-window set when its operating range and mounting arrangement fit your greenhouse.”
2-Pack Automatic Greenhouse Vent Opener with Dual Springs
When opening distance is central to the decision, this pair is the easiest of the three to assess: it specifies up to 18 inches (45 cm) of vent travel and a 30-pound lifting capacity per the supplied description. That extra clarity can help us check whether a vent can reach the clearance we want. Like our overall pick, it uses dual springs and responds to heat, but its listing adds a full-opening point above 30°C (86°F), plus a maximum recommended temperature of 60°C (140°F). Those details make its stated operating behavior more explicit, although they do not promise a particular greenhouse temperature or override installation conditions.Aluminum cylinders and frames with stainless-steel accessories are specified, and fitting accessories plus an installation manual are included. That is more material detail than the first model provides, but it still needs a greenhouse window suitable for this kind of mounted opener. Choose this one over the aluminum-alloy overall pick when the stated travel and operating details matter most to planning. Choose the first pick if its simpler specification set is sufficient and you place more weight on its corrosion-resistant construction description. Neither is a universal solution for heavy or incompatible windows.
Pros:
- Maximum vent travel is specified as 18 inches (45 cm).
- Dual-spring design is rated to lift up to 30 lbs.
- Aluminum frame and cylinder with stainless-steel accessories are specified.
- Includes fitting accessories and an installation manual.
Cons:
- Requires a suitable greenhouse window installation.
- The listing says not to use where temperatures exceed 60°C (140°F).
- A stated travel limit does not confirm compatibility with a particular vent.
Best for: Owners who want to compare a stated 18-inch maximum travel with their vent clearance before choosing.
Not ideal for: Greenhouse owners whose locations may exceed the stated 60°C recommended maximum or whose windows cannot accept mounted openers.
Bottom line: The most straightforward option when we need a published travel distance and detailed operating limits.
“The most straightforward option when we need a published travel distance and detailed operating limits.”
Automatic Greenhouse Window Opener, 2-Pack
This set’s main distinction is manual adjustment of the opening, giving us a way to set the vent’s travel instead of relying solely on a fixed maximum. It is also rated for up to 30 pounds and has dual springs, putting its stated lifting capacity in line with the other two choices. The galvanized-steel body differentiates it from the aluminum construction of our top pick and the aluminum-and-stainless specification of the second; buyers should weigh that material choice against their own expectations for outdoor exposure and maintenance.The major drawback is uncertainty: the supplied temperature specification says 15–25 but notes inconsistent or unclear units, despite also listing 60–77. That makes it harder to compare its trigger behavior directly with the other products. Setup also calls for retracting the cylinder rod in a refrigerator for at least five minutes, a more particular preparation step than the first two listings describe. We’d consider it when manual travel adjustment is valuable and the buyer is comfortable confirming the temperature details before purchase. If clearly stated operating limits and simpler setup are more important, the second model is easier to evaluate; if material clarity and general-purpose use lead, the first is a safer comparison point.
Pros:
- Opening can be manually adjusted up to 17.72 inches.
- Dual springs and a stated 30-pound load capacity.
- Two openers, clamps, and screws are included.
- Galvanized-steel body is specified.
Cons:
- Temperature units and limits are unclear in the supplied information.
- Installation requires retracting the cylinder rod in a refrigerator for at least five minutes.
- Galvanized steel differs from the aluminum construction of the other two options.
Best for: Buyers who want manual control over maximum vent opening and can verify the temperature details before installation.
Not ideal for: Anyone who wants clearly documented temperature units or prefers a setup without the specified refrigerator step.
Bottom line: A useful adjustable-opening alternative if its unclear temperature details and setup requirement are acceptable.
“A useful adjustable-opening alternative if its unclear temperature details and setup requirement are acceptable.”
As an Amazon Associate we earn from qualifying purchases.
Before You Start
Read the opener instructions before drilling or removing any hardware. Models differ in mounting position, fasteners, opening range, and adjustment method. Support an overhead vent while fitting the opener, and keep fingers clear of hinges and closing edges. Do not force the vent against its stops or use the opener to overcome a jam.
Step-by-Step Instructions
Step 1: Check the vent and opener
Open and close the vent by hand through its full range. Remove debris, check the hinges and latches, and tighten loose frame hardware. Compare the vent’s dimensions and weight with the opener’s stated limits, then identify the fixed-frame and moving-vent mounting points from the kit instructions.
Tip:Repair stiff hinges or a distorted frame before installation. A thermal opener is designed to move a free vent, not force a stuck one.
Check: The vent moves smoothly without scraping, binding, or catching, and the opener is rated for it.
Step 2: Choose the mounting position
Hold the supplied brackets in the recommended positions on the fixed frame and moving vent. Check that the cylinder and piston will travel in line as the vent opens, and that the assembly will not hit a hinge, glazing bar, latch, or greenhouse wall. Mark the fixing holes as directed by the manufacturer.
Tip:Do not choose a position based only on convenience. Incorrect bracket spacing or alignment can limit travel or put sideways strain on the piston.
Check: The marked positions match the kit diagram, with a clear path for the piston and room for the vent to open.
Step 3: Attach the brackets
Keep the vent supported. Fasten the opener’s brackets to the fixed frame and moving vent using the supplied screws or bolts and the specified holes. Tighten the fasteners securely without crushing thin frame sections. If the instructions call for pilot holes, drill them to the stated size and take care not to damage glazing.
Tip:Use only fixings approved for your frame material. If a bracket cannot sit flat or the frame flexes, stop and check the installation instructions or ask the greenhouse supplier about a suitable mounting method.
Check: Both brackets sit firmly in place, and the frame and glazing remain undamaged.
Step 4: Fit the cylinder and piston
Connect the cylinder and piston to the brackets in the order shown in the kit instructions. Fit retaining clips, pins, or locking nuts as supplied. Keep the piston aligned with the bracket pivots and confirm that it can extend and retract without rubbing against the frame.
Tip:Do not dismantle or puncture the wax cylinder. It is a sealed temperature-sensitive component; follow the manufacturer’s instructions for handling and storage.
Check: The opener is secured at both ends, the retaining hardware is fitted, and the piston moves along its intended line.
Step 5: Check the vent’s travel
Move the vent slowly by hand while watching the opener and brackets. Confirm that the assembly does not twist, bind, or collide with other hardware through the vent’s usable range. Check that the vent can still close fully and that any built-in stop or chain is positioned as directed by the manufacturer.
Tip:Stop if the piston reaches the end of its travel before the vent reaches its intended opening, or if the frame flexes. Correct the bracket position according to the kit diagram before operating the opener.
Check: The vent moves through its intended range, closes fully, and does not strain the cylinder or brackets.
Step 6: Set the opening temperature
Adjust the opener only if your model has a temperature-setting mechanism. Follow its instructions, making small changes rather than turning the adjustment sharply. Some models use a threaded cylinder or separate adjustment collar; others are not adjustable. Do not assume that turning the cylinder changes the setting unless the manual says so.
Tip:Set the opening response to suit the plants and greenhouse conditions. If you are unsure, use the maker’s recommended starting setting, then observe the greenhouse during warm weather.
Check: The adjustment is within the range specified for the model, with no forced or improvised setting.
Step 7: Test the opener and observe a full cycle
Let the greenhouse warm naturally or test the opener using the method stated by its manufacturer. Watch for the vent to begin opening as the cylinder warms, then check that it returns toward closed as it cools. Keep clear of moving parts and do not heat the cylinder with a flame, heat gun, or other concentrated source.
Tip:A wax-cylinder opener responds gradually, so the vent may not move immediately. Ambient temperature, sunlight, airflow, and the model’s design affect how quickly it responds.
Check: The vent opens and closes smoothly as temperature changes, stays within its intended travel, and the brackets remain secure.
Common Mistakes to Avoid
- Installing the opener on a vent that sticks or has loose hinges. — Test the vent by hand and repair binding, damaged hinges, or loose hardware before fitting the opener.
- Mounting brackets out of line or at the wrong spacing. — Use the model’s bracket diagram, check the piston path, and confirm the vent’s full movement before final tightening.
- Forcing the vent beyond the opener’s travel. — Follow the manufacturer’s opening limits and fit any supplied stop, chain, or travel limiter as directed.
- Expecting the opener to react instantly or adjusting it by guesswork. — Allow time for the cylinder to warm or cool, and make only small adjustments described in the instructions.
Troubleshooting
Problem: The vent does not open as the greenhouse warms.
Solution:
Check that the cylinder and piston are fitted in the correct orientation and that no latch is engaged. Inspect the vent for binding and verify bracket alignment. Allow time for the cylinder to warm, then consult the manual for the model’s operating temperature and adjustment method.
Problem: The vent opens only partway or the piston appears strained.
Solution:
Check for frame or hinge resistance, a misplaced bracket, or an obstruction along the vent’s path. Compare the bracket positions with the installation diagram and check that the opener suits the vent’s size and weight. Do not force the piston to extend farther.
Problem: The vent does not close after the greenhouse cools.
Solution:
Check that the vent is not caught on a latch or frame edge and that the opener is not obstructed. The cylinder may need more time to cool. If the vent remains open after cooling and the mechanism moves freely, use the manufacturer’s adjustment and fault-checking instructions.
Problem: A bracket loosens or the frame flexes during operation.
Solution:
Stop using the opener and support the vent. Check the fasteners and frame material against the kit requirements. Replace unsuitable fixings or seek advice from the greenhouse supplier before operating it again.
What Success Looks Like
The brackets remain secure, the piston stays aligned, and the vent moves freely through its intended range. As the greenhouse warms, the vent opens gradually; as it cools, the vent returns toward closed. The vent does not jam, collide with nearby hardware, or exceed the opener’s travel.
Next Steps
Observe the vent during warm and cool parts of the day for the first few days. Make small setting changes only if the model allows them and the vent opens too early or too late for your plants. Periodically clear debris, check hinges and fasteners, and inspect the opener for damage. Before strong winds or winter weather, follow the greenhouse and opener instructions on securing or removing the mechanism.
Frequently Asked Questions
How long does an automatic greenhouse vent opener take to open?
There is no single timing. A wax-cylinder opener responds gradually, and movement depends on the model, cylinder temperature, sunlight, airflow, and vent load. Check its operation over a natural warming and cooling cycle.
Can I fit an automatic opener to any greenhouse vent?
No. Check the opener’s rated vent size and weight, its bracket compatibility, and the greenhouse maker’s guidance. The vent must move freely and provide suitable fixing points.
Can I leave the opener installed in winter?
Follow the opener and greenhouse instructions. Some models can stay fitted, while others should be removed or secured to prevent damage from frost, wind, or excessive vent movement.
Why does my vent open at the wrong temperature?
Some models have an adjustment feature and others do not. Check the manual for the specified setting method and operating range, then make a small adjustment if permitted. Also account for the temperature around the cylinder, which can differ from the air near your plants.
Fall yard work Picks
leaf blowers
As an affiliate, we earn on qualifying purchases.