To cultivate radishes successfully, I recommend starting with non-GMO heirloom varieties like French Breakfast and Purple Plum. Prepare well-tilled, nutrient-rich soil, keeping the pH between 6.0 and 7.0. Plant seeds at the right depth and spacing, ensuring consistent watering without overdoing it. Regularly check for pests and diseases while using crop rotation to enhance soil health. Follow these tips, and you’ll grow your own radishes in no time. There are more helpful insights I can share with you!
Key Takeaways
- Choose suitable seed varieties based on climate and flavor preferences, opting for non-GMO heirloom options for organic gardening.
- Prepare well-tilled, loamy soil with a pH of 6.0 to 7.0, incorporating aged manure for enhanced nutrients.
- Sow seeds ½ to 1 inch deep, spaced 1 inch apart in rows, ensuring proper air circulation and moisture retention.
- Water consistently, providing about 1 inch of water weekly, and monitor for signs of bolting or pests.
- Harvest when radishes reach 3-4 inches for optimal flavor, and store them in a cool, dry place for freshness.

French Breakfast Radish Seeds for Planting
- Heirloom French Radish: Classic elongated red and white roots
- Fast-Growing Crop: Harvest in approximately 25 days
- Cool Season Planting: Ideal for spring and fall gardens
As an affiliate, we earn on qualifying purchases.
French Breakfast Radish Seed for Planting – Non-GMO Heirloom Variety
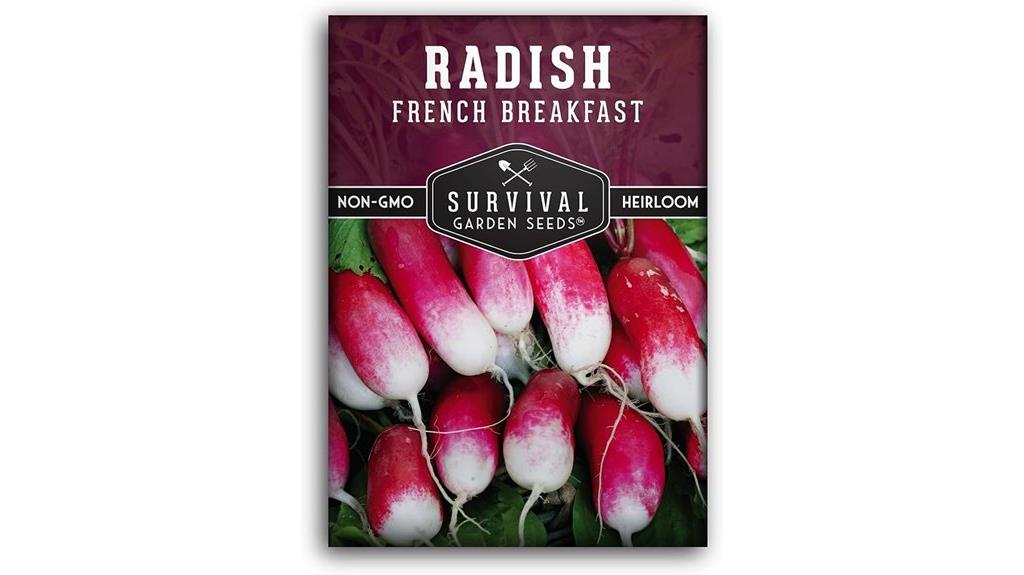
If you’re a home gardener looking to add a unique touch to your vegetable patch, the French Breakfast Radish Seed is a fantastic choice. This non-GMO heirloom variety features elegant, long radishes with striking red exteriors and white tips. I love their mild, delicate flavor, perfect for salads or snacks. They thrive in cool spring and fall weather, maturing in just 25 days! Plus, I appreciate that they come with instructions for successful growing and seed saving. Store them in a cool, dry place, and you’ll have viable seeds for years. This small American, family-owned business guarantees high-quality seeds for my garden!
Best For: Home gardeners looking to cultivate unique and flavorful vegetables in their gardens.
Pros:
- High-quality, non-GMO heirloom seeds that ensure optimal growth and flavor.
- Quick maturation time of just 25 days, allowing for fast harvesting.
- Comes with detailed growing instructions and seed saving tips for long-term gardening success.
Cons:
- Best suited for cooler weather, which may limit growing seasons in warmer climates.
- Requires specific storage conditions to maintain seed viability over the years.
- May not be as widely available as other common radish varieties in some stores.
Easter Egg Radish Seeds for Planting (250+ Heirloom Seeds)

Easter Egg Radish Seeds, with over 250 heirloom, non-GMO seeds in each packet, are perfect for gardeners looking to add a splash of color and flavor to their home gardens. These petite, round radishes come in delightful shades of white, pink, crimson, and purple. I recommend planting them 4-6 weeks before the last frost, sowing seeds ½ to 1 inch deep, spaced 1 inch apart in rows 12 inches apart. Incorporating aged manure into the soil boosts growth. Their rich flavor makes them ideal for salads. Plus, they’re easy to grow and visually stunning—definitely a must-try for any garden!
Best For: Gardeners seeking to enhance their vegetable garden with colorful and flavorful heirloom radishes.
Pros:
- Rich in flavor: Ideal for salads and culinary dishes.
- Visual appeal: Offers a variety of colors, making gardens vibrant and attractive.
- Easy to grow: Suitable for a wide range of hardiness zones (3-12) and straightforward planting instructions.
Cons:
- Bolting in heat: Some gardeners may experience bolting during hot weather conditions.
- Limited growing season: Best planted in cooler seasons, which may restrict growing periods in warmer climates.
- Requires soil preparation: Needs incorporation of aged manure for optimal growth, which may require extra effort.
Korean Premium Dried & Sliced Daikon Radish (6 Ounce)
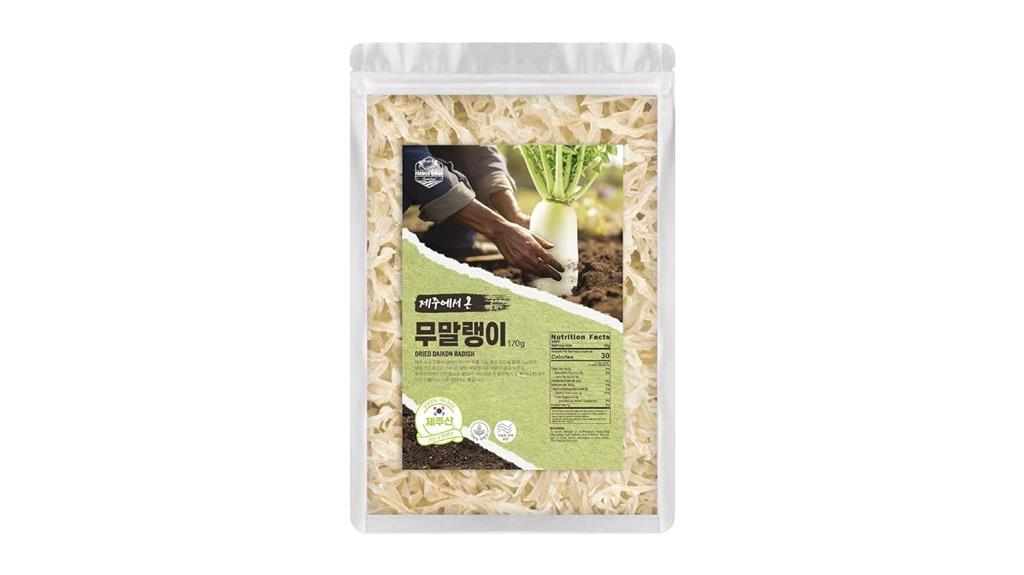
Korean Premium Dried & Sliced Daikon Radish (6 Ounce) is perfect for anyone looking to elevate their culinary creations, especially those interested in authentic Korean cuisine. This product hails from Jeju Island and is made from 100% natural radish, free of preservatives and additives. I love its fresh, mild, and tangy flavor that adds a crunchy texture to kimchi. Rich in essential nutrients like calcium and Vitamin C, this dried daikon is both delicious and healthy. To prepare, just rinse and boil until plump. Store it properly, and you’ll enjoy its quality and flavor for up to a year!
Best For: Anyone seeking to enhance their cooking with authentic Korean flavors, particularly those who enjoy making kimchi or nutritious dishes.
Pros:
- 100% Natural: Free from preservatives, flavorings, colors, or additives, ensuring freshness and authenticity.
- Rich in Nutrients: Packed with essential vitamins and minerals like calcium, magnesium, and Vitamin C.
- Convenient Preparation: Easy to prepare by rinsing and boiling, making it a quick addition to meals.
Cons:
- Slight Smell: Some users may notice a slight smell, which could be off-putting for certain individuals.
- Taste Variability: A few customers expressed dissatisfaction with the taste or how it fits their dietary preferences.
- Storage Requirements: Requires proper storage in an airtight container to maintain quality over time.
Purple Plum Radish Seeds for Planting (150+ Heirloom Seeds Per Packet)

For gardeners looking to experiment with unique flavors and vibrant colors, the Purple Plum Radish Seeds are a fantastic choice. This heirloom variety, originating from China, offers over 150 seeds per packet, ensuring plenty of delicious harvests. I love how they grow to about 9 inches and mature in just 25 days! Plant them half an inch deep, spaced 4 inches apart, in full sun. Their sweet, mild flavor and striking appearance make them perfect for salads, pickling, or stir-fries. Just remember to rotate your planting site annually for the best results and avoid growing them near cabbage.
Best For: Gardeners seeking a unique heirloom radish variety that offers sweet flavors and vibrant colors.
Pros:
- Fast Maturity: Reaches harvest in just 25 days, allowing for quick turnover in the garden.
- Versatile Culinary Uses: Great for salads, pickling, stir-fry, and more, enhancing various dishes with their sweet flavor.
- Non-GMO and Heirloom: Provides an organic gardening option with a traditional seed lineage.
Cons:
- Mixed Germination Success: Some customers have reported issues with seed quality and germination rates.
- Potential for Incomplete Packets: A few buyers received empty packets or lower-than-expected yields.
- Companion Planting Restrictions: Should not be planted near cabbage or broccoli, limiting planting options.
Black Spanish Round Radish Seeds (150+ Heirloom Seeds per Packet)

If you’re a home gardener looking to add a unique flavor to your dishes, the Black Spanish Round Radish Seeds are a fantastic choice. Each packet contains over 150 heirloom seeds, perfect for planting in hardiness zones 3-12. I’ve found they thrive best when planted in well-tilled soil, about four inches deep. Just remember to rotate your planting site yearly and avoid nearby cabbage or broccoli. Harvesting them at 3-4 inches gives you the best flavor! Plus, they can be stored for winter use, providing tasty and medicinal benefits all season long. Enjoy the crisp, zesty addition to your meals!
Best For: Home gardeners seeking to diversify their vegetable garden with a unique, flavorful radish option.
Pros:
- Non-GMO seeds that are ideal for organic gardening.
- High yield with 150+ heirloom seeds per packet, providing plenty for planting.
- Suitable for hardiness zones 3-12, making them versatile for various climates.
Cons:
- Mixed reviews on germination and growth, with some experiencing issues.
- Potential packaging accuracy concerns, as discrepancies have been reported between seed type and visuals.
- Requires careful site rotation and specific planting conditions, which may be challenging for some gardeners.
Factors to Consider When Choosing Radish Cultivation
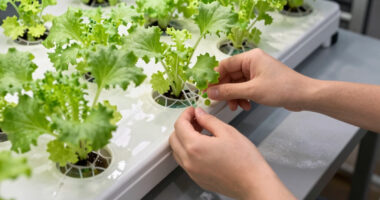
When I choose to cultivate radishes, I consider several key factors to guarantee a successful harvest. Selecting the right seed variety, timing my planting, and preparing the soil properly are all essential steps. I also pay close attention to watering, drainage, and sunlight needs to help my radishes thrive.
Seed Variety Selection
Choosing the right seed variety is essential for successful radish cultivation, especially since different types thrive under varying conditions. I always consider the growing season; for instance, French Breakfast and Easter Egg radishes flourish in cooler temperatures, while others can handle a wider range. Flavor and culinary uses also play a role—Purple Plum radishes are sweet, while Black Spanish Round adds a spicy kick. Don’t overlook maturity times; many varieties mature quickly, like the French Breakfast in just 25 days, perfect for quick harvests. I prefer open-pollinated and non-GMO heirloom seeds for better germination rates and genetic diversity. Finally, I think about the appearance; Easter Egg radishes are colorful and charming in any garden.
Optimal Planting Time
Timing is essential for successful radish cultivation, as these quick-growing veggies thrive best in cooler weather. I typically plant radishes 4-6 weeks before the last frost of spring or in the fall for a second harvest. If you’re looking for a fast turnaround, consider the French Breakfast Radish, which matures in just 25 days. It’s vital to pay attention to soil temperature; ideally, it should be between 45°F to 85°F for ideal germination. Depending on the variety, such as the Easter Egg Radish, you might need to plant at specific depths of ½ to 1 inch and space them 1 inch apart. Don’t forget regular crop rotation to keep your soil healthy and productive!
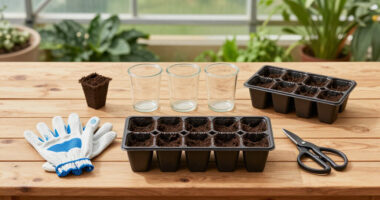
Soil Preparation Techniques
Proper soil preparation is essential for successful radish cultivation, and I always prioritize a few key techniques. First, I till the soil to a depth of at least four inches, ensuring it’s aerated for robust root development. Next, I incorporate organic matter like aged manure or compost, boosting soil fertility and providing nutrients for rapid growth. I also check the pH level, aiming for 6.0 to 7.0, which promotes ideal nutrient absorption. Good drainage is critical since radishes can rot in overly saturated soil, hindering germination. Finally, after planting, I lightly cover the seeds with aerated soil to retain moisture while allowing air circulation, which is essential for successful germination and healthy plants.
Watering and Drainage
After setting the stage with well-prepared soil, I turn my attention to watering and drainage, which play a vital role in radish cultivation. Radishes need consistent moisture, about 1 inch of water per week, especially during dry spells. However, overwatering can lead to root rot, so good drainage is essential. I find that well-drained loamy or sandy soils work best, allowing excess water to escape while retaining some moisture. If you’re dealing with heavy clay soils, consider implementing raised beds to improve drainage. Additionally, I like to mulch around my radish plants; it helps retain moisture and regulate temperature, promoting healthier growth and better yields. With these tips, I’m on my way to a successful radish harvest!
Sunlight Requirements
When it comes to radish cultivation, verifying your plants get enough sunlight is essential for their growth and flavor. I’ve found that radishes thrive in full sun, needing at least six hours of direct sunlight each day. If they don’t get enough light, I’ve noticed slower growth and an increased risk of bolting, especially when the weather warms up. While different varieties might have slight differences in sunlight needs, most prefer consistent exposure. I’ve also learned that planting in partially shaded areas leads to smaller roots and a less desirable taste. So, I always keep an eye on how much sunlight my radish plants receive, making adjustments to their location if necessary to verify they get adequate light.
Pest Management Strategies
While cultivating radishes, I’ve learned that effective pest management is crucial for a successful harvest. One key strategy I use is crop rotation, which disrupts pest life cycles and improves soil health. Pairing radishes with companion plants like marigolds or nasturtiums helps deter pests such as aphids and beetles. I also make it a point to regularly monitor for common pests like flea beetles and root maggots. Using barriers like row covers protects my young plants effectively. Introducing natural predators like ladybugs and lacewings has been a game changer, as they control pest populations without chemicals. Finally, I guarantee proper watering and soil conditions, since healthy radishes are much more resilient against infestations.
Harvesting Guidelines
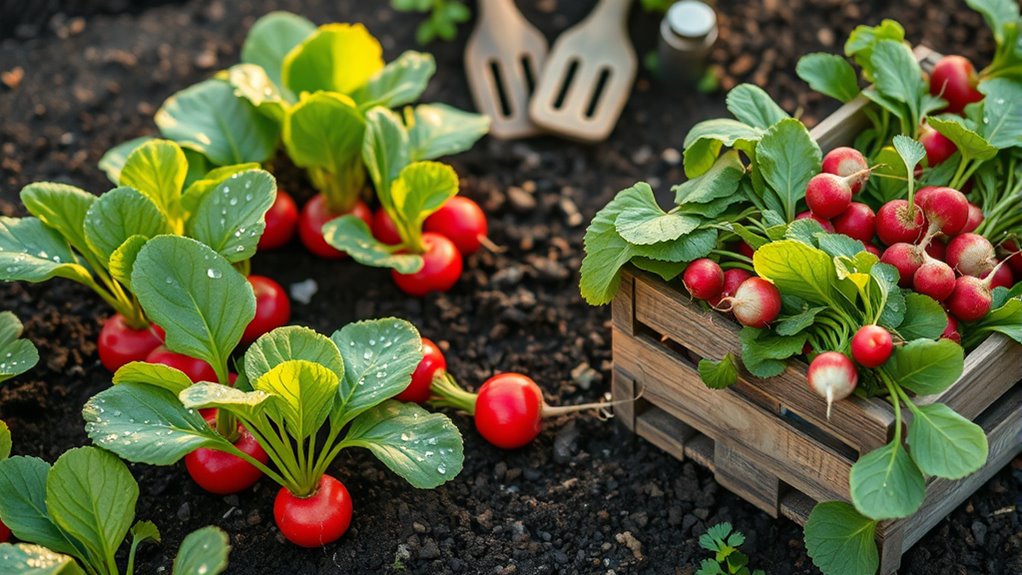
Knowing the right time to harvest radishes is essential for enjoying their best flavor and texture. Typically, they’re ready when they reach a diameter of 1 to 2 inches, which usually happens 25 to 30 days after planting. It’s important to harvest them promptly, especially in warmer weather, to avoid a pithy or overly spicy taste. For the best flavor, aim for young, tender radishes, as older ones can be tough and strong. When it’s time to pull them, gently lift them from the soil to prevent damage to the roots. After harvesting, rinse them, trim the greens, and store them in a cool, dry place or refrigerate to keep them fresh for several days.
Frequently Asked Questions
How Long Does It Take for Radishes to Mature?
When I grow radishes, I find they usually mature in about 25 to 30 days. It’s amazing how quickly they can go from seed to harvest. I love watching them sprout and grow during that short time. Just make sure you keep the soil moist and provide enough sunlight, and you’ll be rewarded with crisp, tasty radishes. If you’re patient, you’ll enjoy a fresh, homegrown snack in no time!
What Is the Best Time of Year to Plant Radishes?
Planting radishes is like setting the stage for a quick performance. I’ve found the best time to sow them is in early spring or fall, when the soil’s cool and inviting. They thrive in temperatures between 50°F and 70°F, so I make sure to time my planting accordingly. You’ll see those little greens popping up faster than you can say “salad,” and before long, I’m enjoying my homegrown harvest!
Can Radishes Be Grown in Containers?
Absolutely, I’ve grown radishes in containers before, and it’s a fantastic option! Just make sure you choose a container that’s at least six inches deep, as radishes need space to develop their roots. I usually fill it with well-draining potting soil and keep it watered but not soggy. It’s so rewarding to see those vibrant radishes popping up, and I love having fresh produce right on my patio!
How Often Should I Water My Radish Plants?
You’d think I’d need a crystal ball to know how often to water my radishes, right? But here’s the scoop: I water them every few days, especially when the soil feels dry an inch down. Radishes thrive with consistent moisture but don’t like soggy roots. I’ve learned to check regularly—too little water can lead to tough, bitter roots. So, keep an eye on them, and you’ll have a delicious harvest in no time!
What Pests Commonly Affect Radish Crops?
When it comes to pests that commonly affect my radish crops, I’ve noticed a few culprits that can wreak havoc. Aphids, flea beetles, and root maggots are the main offenders. I’ve found that keeping an eye on the leaves helps catch these pests early. If I spot any, I act quickly by using insecticidal soap or neem oil. It’s all about staying proactive to protect my radishes and guarantee a healthy harvest.
Conclusion
To sum up, growing radishes can be incredibly rewarding, especially since they’re one of the fastest crops to mature—some varieties can be ready to harvest in just 25 days! By selecting the right seeds, like the French Breakfast or Easter Egg varieties, and paying attention to factors like soil and sunlight, you can enjoy a bountiful harvest. So, why not give it a try? You might just discover a new favorite in your garden!