To build a DIY greenhouse for under $100, start by choosing a compact type like a mini greenhouse or hoop house. Source affordable materials from reclaimed items or local classifieds. Construct a sturdy frame using 2x4s, then install windows for light and ventilation. Cover it with greenhouse plastic. Finally, ensure proper air circulation and consider adding decorative touches. There’s much more to explore about maximizing your greenhouse’s potential!
Key Takeaways
- Choose a budget-friendly greenhouse type like a hoop house or mini greenhouse to maximize space and minimize costs.
- Source affordable materials by using reclaimed items, local classifieds, or Habitat for Humanity stores for budget-friendly construction.
- Construct the frame using 2×4 lumber and ensure it’s level for stability, keeping costs around $100.
- Install windows and doors from old materials, ensuring proper fitting and functionality to enhance ventilation.
- Design the greenhouse with a simple pathway and decorative elements to create an inviting and functional growing space.

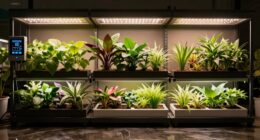
Uallhome 2 Pack LED Grow Light Panel 200W Lamp for Indoor Plants, Full Spectrum with White Blue Red UV IR LEDs for 4x4ft Coverage Grow Tent Greenhouse Veg and Bloom Seedlings Hydroponics
Beetter light spectrum optimization: Full spectrum lights are all-around products that can provide adequate and balanced lighting for...
As an affiliate, we earn on qualifying purchases.
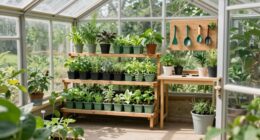
Choosing the Right Greenhouse Type
When considering how to build your DIY greenhouse, which type best fits your needs?
A lean-to greenhouse is perfect if you’re short on space, as it uses existing structures for support and retains heat well during winter.
If you need storage, a combination greenhouse serves dual purposes, giving you room for tools while nurturing plants.
For those with larger plots, a freestanding greenhouse offers flexibility in design and maximum sunlight exposure.
If you’re in an urban setting, a mini greenhouse is compact and portable, ideal for beginners.
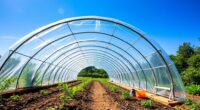
Lastly, a hoop house is an inexpensive and simple option that doesn’t require a permit, making it great for extending your growing season without breaking the bank.
Choose wisely!

4 Tier Mini Greenhouse - Portable Greenhouse with Locking Wheels and PVC Cover for Indoor or Outdoor Green House by Pure Garden
4-TIER GREENHOUSE KIT - The 4 tiers of sturdy shelving in this small greenhouse are 27-inches-wide, have 14-inches...
As an affiliate, we earn on qualifying purchases.
Budgeting for Your Greenhouse Project

Selecting the right greenhouse type sets the foundation, but budgeting for your greenhouse project is just as important.
Choosing the appropriate greenhouse type is essential, but careful budgeting is equally crucial for success.
Start by estimating your framing costs; 2×4 lumber is a reliable choice at around $20 for a small greenhouse. Don’t forget fasteners—screws and nails will cost you about $20.
For covering, greenhouse plastic or polythene film is an economical option at approximately $7.50. If you use recycled windows, you can find them for as little as $3.
Additionally, set aside around $5 for miscellaneous hardware. By taking the DIY approach, you can save on labor costs.
Always budget for unexpected expenses to ensure your project stays within the $100 limit while maximizing your greenhouse’s potential.

MIXC 230FT Quick-Connect Drip Irrigation System Kit, Automatic Garden Watering System with 1/4" & 1/2" Fast-Lock Tubing - Adjustable Nozzles & Sprinklers for Garden, Greenhouse, Lawn, Potted Plants
✔Comprehensive Drip Irrigation Kit:MIXC drip irrigation system, equipped with a versatile range of components, caters to all your...
As an affiliate, we earn on qualifying purchases.
Sourcing Affordable Materials

Finding affordable materials for your DIY greenhouse can significantly reduce your overall costs and increase your project’s sustainability.
Start by checking out reclaimed materials like old windows for walls and roofs, or lumber from pallets. You can also creatively use scrap items such as PVC pipes or irrigation hoses. Building a greenhouse can be a rewarding DIY project that allows you to grow your own food and extend your gardening season. Consider incorporating chia seeds into your greenhouse to take advantage of their fast-growing cycle, as they thrive in optimal conditions. Incorporating plants like baked kale can also enhance the nutritional value of your gardening efforts. Utilizing reclaimed materials can not only save money but also promote eco-friendliness in your project.
Habitat for Humanity stores often offer budget-friendly construction materials, and local classifieds may list free items perfect for reuse.
Don’t forget to explore online resources like Pinterest and YouTube for inspiration and plans.
Additionally, reach out to local landscaping businesses and nurseries for potential discounts or even donations. Incorporating nutrient-dense ingredients like chia seeds into your gardening efforts can also enhance the sustainability of your greenhouse project.

Maotong 240FT Drip Irrigation System Kit New Quick-Connect, Automatic Garden Watering Misting System for Greenhouse, Yard, Lawn, Plant with 1/2 inch Hose 1/4 inch Distribution Tubing and Accessories
Effortless Setup with Quick Connect Design: Say goodbye to tedious setups! Our upgraded 4-way connector, tee, and emitter...
As an affiliate, we earn on qualifying purchases.
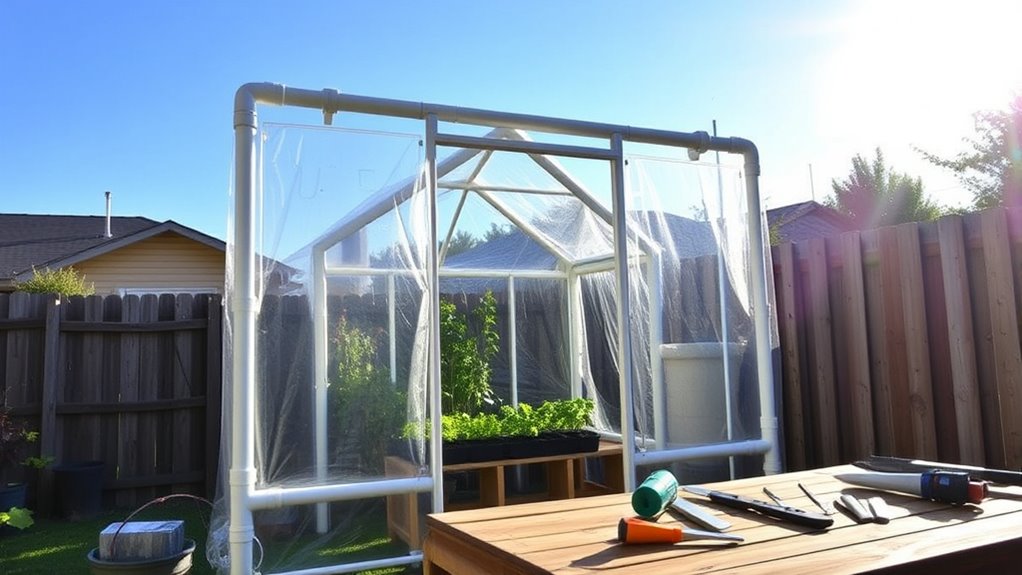
Constructing the Frame

As you embark on constructing the frame for your DIY greenhouse, choosing the right design—be it a lean-to, A-frame, or post-and-beam—sets the foundation for your project.
Start by gathering materials like 2x4s for the frame, 2x6s for rafters, and pressure-treated lumber for durability. With your hammer, level, shovels, and power saw, begin framing the walls, fitting them around your designated windows and doors for structural integrity.
Add rafters and collar ties to strengthen your frame against wind and snow loads. Don’t forget to ensure everything’s level to avoid future issues. Additionally, consider incorporating some solar panels into your greenhouse for an eco-friendly power solution.
Finally, use anchor bolts or screws to secure the frame to the ground, and consider temporary bracing for extra stability during construction.
Installing Windows and Doors

Once you’ve constructed the frame, installing windows and doors is the next crucial step in creating your DIY greenhouse.
Start by sourcing old windows from online marketplaces or thrift stores, but remember to test for lead paint if they’re pre-1975. Refurbish them with paint for protection and aesthetics. Using low light office plants can help ensure your greenhouse remains vibrant even in less-than-ideal conditions. Additionally, chronic feelings of emptiness can be alleviated by cultivating a thriving plant environment, which may enhance your overall well-being. Incorporating AI tools can also streamline your gardening processes, making it easier to manage plant care. Many greenhouse owners also consider precious metal investments to diversify their financial portfolio alongside their gardening ventures.
Build sturdy frames for each window using 2×4 pressure-treated lumber, ensuring they’re square. Securely attach the windows, sealing gaps with caulk to prevent leaks.
When choosing a door, select one that fits your design and allows easy access. Construct a solid frame and install durable hinges.
Lastly, make sure all windows and doors operate smoothly for ventilation and maintenance, creating a healthy environment for your plants. Consider installing scratching posts near your greenhouse to provide enrichment for any visiting cats and prevent them from damaging the plants.
Covering Your Greenhouse

Choosing the right covering for your greenhouse is essential, as it impacts both plant health and energy efficiency.
Selecting the appropriate greenhouse covering is crucial for enhancing plant vitality and optimizing energy efficiency.
For a budget-friendly option, consider polyethylene film. It’s inexpensive, costing between $0.10 and $0.50 per square foot, and easy to install.
If durability and insulation matter more, polycarbonate sheets are a solid choice, ranging from $1.60 to $3 per square foot.
For excellent light diffusion, Solexx covering is ideal, priced at $2.00 to $3.80.
Alternatively, using reclaimed materials like old windows can save money.
Remember that each material has unique maintenance needs, so plan accordingly.
Regular inspections will help extend the life of your greenhouse covering, ensuring your plants thrive throughout the seasons.
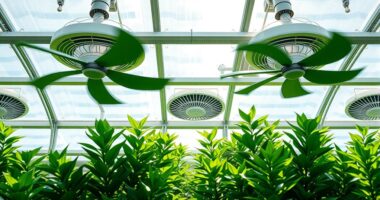
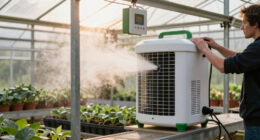
Ensuring Proper Ventilation

Proper ventilation is vital for creating a thriving greenhouse environment, since it helps regulate temperature and humidity levels that affect your plants’ health.
You can choose between active and passive ventilation methods, depending on your greenhouse’s climate. For passive options, consider installing roof and side vents, or simply opening doors and windows to enhance airflow.
Roll-up sides can also be effective in smaller spaces. If you prefer active ventilation, exhaust and circulation fans can help control temperature and humidity precisely, though they require electricity.
Combining both methods often yields the best results, adapting to varying weather conditions while keeping costs manageable. Regular monitoring ensures your plants get the fresh air they need to thrive.
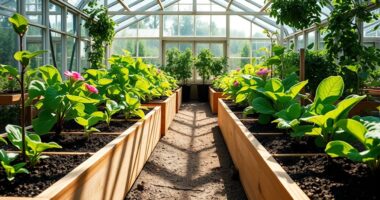
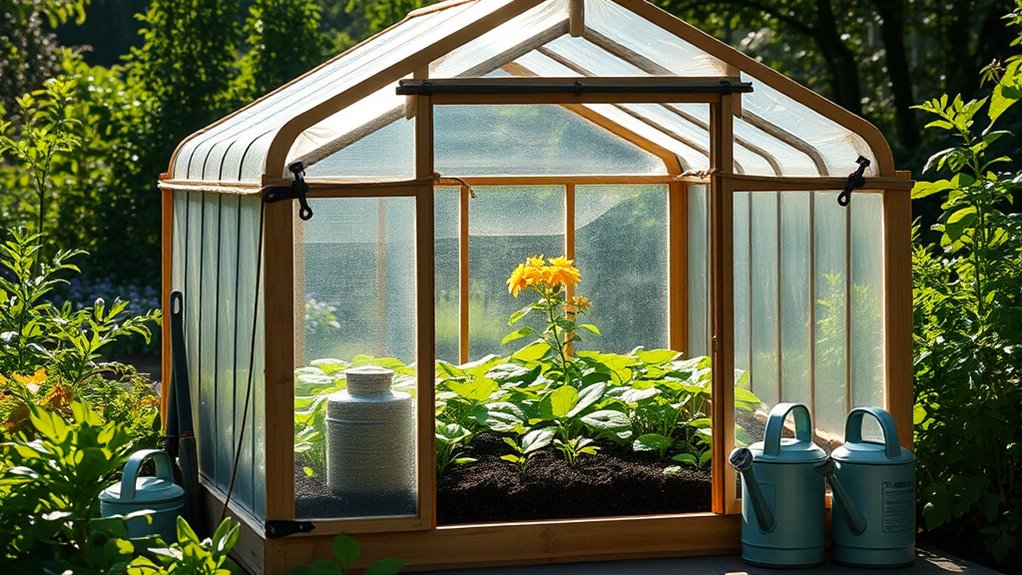
Adding Final Touches

Adding the final touches to your DIY greenhouse can elevate its functionality and aesthetic appeal.
Start by creating a charming pathway with pea gravel and stepping stones that lead to your door. Define the space with landscape edging, and consider adding decorative elements like hanging baskets and large planters. Furthermore, ensure that the design of your greenhouse promotes a seamless experience for elderly individuals who may wish to tend to their plants comfortably. Incorporating functional layouts can significantly enhance accessibility within the space. Effective wall organization can also be considered for storing gardening tools and supplies neatly. Additionally, consider incorporating cozy seating areas to provide a comfortable space for family members to relax and enjoy the greenhouse.
For functionality, build garden beds from acrylic sheeting and slotted 2x4s, ensuring you select a mix of perennials and annuals that thrive in your greenhouse’s light conditions.
Don’t forget to paint the structure in a color that complements your garden. Additionally, consider incorporating rustic lighting to enhance the ambiance and make your greenhouse a welcoming space during the evening.
Finally, consider installing lighting to highlight your greenhouse at night, making it a beautiful focal point in your yard.
Maintaining Your Greenhouse
To keep your greenhouse thriving, regular maintenance is essential. Start by cleaning the interior and exterior, removing plants and debris, and using soapy water.
Don’t forget to clear gutters to prevent blockages. Keep an eye out for pests like greenflies and spider mites; use sticky traps or insect repellents to manage them.
Regularly disinfect your tools to stop diseases from spreading. Inspect your frame for wear and ensure the covering is secure to maintain temperature.
Check vents for proper function, and treat wooden frames with horticultural oil. Replace old soil with fresh, disease-free options, and ensure proper drainage.
Lastly, prepare for seasonal changes by insulating in winter and ventilating in summer.
Frequently Asked Questions
How Long Does It Take to Build a Greenhouse?
Building a greenhouse can take anywhere from a few hours to several weeks, depending on its size and complexity.
If you choose a simple design, like a mini or PVC hoop greenhouse, you might finish in a weekend.
Larger structures or more intricate designs could extend the timeline significantly.
Your experience level and available help will also impact how long it takes, so gather your materials and get started!
What Tools Do I Need for Construction?
For your construction project, you’ll need a few essential tools.
Grab a tape measure to ensure accuracy, a level to keep everything straight, and a utility knife for cutting materials.
A cordless drill will make assembling faster, and a hammer’s handy for driving nails.
Don’t forget screwdrivers, pliers, and wrenches for fasteners.
Optional tools like a laser level or scaffolding can enhance precision and ease, especially for larger builds.
Can I Build a Greenhouse in Winter?
Did you know that nearly 30% of gardeners successfully grow plants in winter greenhouses?
Yes, you can build a greenhouse in winter! While cold temperatures and snow can pose challenges, careful planning makes it doable.
Focus on insulation, choose a sunny location, and ensure proper ventilation.
You’ll want to incorporate thermal mass to retain heat and monitor temperatures regularly.
With the right strategies, your winter greenhouse can thrive despite the chilly weather!
How Do I Prevent Pests in the Greenhouse?
To prevent pests in your greenhouse, start by installing insect screens on intakes to block unwanted visitors.
Maintain a vegetation-free zone around the structure and ensure proper ventilation for humidity control.
Regularly clean your space to eliminate debris.
Grow pest-resistant plant varieties, and manage soil and water carefully to avoid attracting pests.
Lastly, consider introducing beneficial insects and using natural repellents like diatomaceous earth or garlic sprays for added protection.
What Plants Grow Best in a DIY Greenhouse?
In a DIY greenhouse, you’ll find that easy-to-grow herbs like cilantro, sage, and rosemary thrive well.
For vegetables, consider lettuces and carrots, which can grow year-round with the right conditions.
If you’re interested in fruits, papaya and holiday cacti are great choices.
Remember to provide proper sunlight, ventilation, and watering for healthy plants.
You’ll enjoy a diverse and productive garden by selecting the right varieties for your greenhouse environment.
Conclusion
Building a DIY greenhouse for under $100 isn’t just a budget-friendly project; it’s like planting a seed that grows into a flourishing garden. Just as a seed needs the right conditions to thrive, your greenhouse requires careful planning and effort. Once you’ve constructed it, you’ll witness your plants blossom, providing fresh produce and a sense of accomplishment. So, roll up your sleeves, embrace the process, and watch your green thumb flourish in this rewarding endeavor!