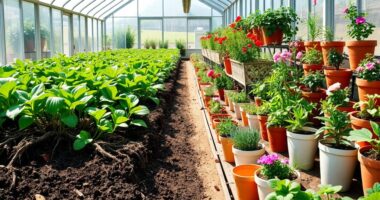
Choose and set up a greenhouse heater that can maintain the temperature your plants need without creating fire, electrical, or carbon monoxide hazards. This guide is for greenhouse owners who can use basic measuring tools and follow equipment instructions; allow 1–3 hours for planning and setup, then monitor conditions over several nights.

Get garden gear delivered free with Prime
- Fast, free delivery on millions of items
- Prime Video, Amazon Music and more included
- Member-only deals all year

Greenhouse Heater with Thermostat – Auto Power Control, Digital Temperature Display, Fast Heating, Overheat Protection – Electric…
- ✔ Heat output: 1500 watts
- ✔ Stated coverage: About 120 sq ft
- ✔ Amperage: 15 A

VEVOR Greenhouse Heater, 1500W Electric Space Heater with Thermostat, Fan & High Heat Modes, 25° Adjustable Angle, IPX4 & Overhea…
- ✔ Power output: 1500 watts
- ✔ Voltage: 120 V
- ✔ Amperage: 12.5 A

1500W Greenhouse Heater with Thermostat, 2 Pack, Green
- ✔ Quantity: 2 heaters
- ✔ Maximum power: 1500W high / 750W low / 24W fan-only per unit
- ✔ Power supply: 110V AC / 60Hz
Difficulty: Intermediate | Time: 1–3 hours, plus time to monitor temperatures
What You’ll Need
Tools & Materials:
- Tape measure
- Minimum-maximum thermometer or digital thermometer with a remote sensor
- Heater manufacturer’s installation and safety instructions
- Suitable outdoor-rated extension cord only if the heater instructions allow one
Knowledge:
- Basic greenhouse dimensions and plant temperature needs
- Ability to identify an appropriate electrical circuit or fuel supply
Check local electrical and fire-safety requirements and the heater’s rating before purchase. If you are unsure whether wiring, a circuit, or fuel ventilation is suitable, ask a qualified electrician or heating professional before connecting the unit.
Greenhouse Heater with Thermostat – Auto Power Control, Digital Temperature Display, Fast Heating, Overheat Protection – Electric…
The SmterCon earns our top spot by making temperature maintenance its central strength. Its digital thermostat and automatic power control are designed to regulate heat around a chosen setting, which can reduce the need for constant manual adjustments. The product description states coverage of about 120 square feet; that gives small-greenhouse shoppers a useful reference, though actual performance will depend on insulation, outdoor conditions, and heat loss. Its 1500W output matches the other single-unit pick, VEVOR, so the advantage here is the thermostat kit rather than greater heating capacity.Compared with VEVOR, this unit emphasizes set-and-maintain operation, while VEVOR offers an adjustable angle and a specified IPX4 rating. Compared with the two-pack, SmterCon keeps the setup simpler: one floor-mounted heater rather than two units and separate climate monitors. It also offers adjustable ventilation for warmer conditions, adding some year-round utility. The tradeoffs are its stated coverage limit and potentially noticeable fan noise. The listed 15A draw also deserves attention when planning the circuit. This is a practical choice for a compact space where automatic control matters more than extra monitoring or multi-unit coverage.
Pros:
- Digital thermostat is designed to maintain a chosen temperature automatically.
- The description states coverage of about 120 square feet.
- Adjustable ventilation can support air movement when heat is not needed.
- Overheat protection is included.
Cons:
- Stated coverage may be inadequate for larger or poorly insulated greenhouses.
- Fan noise may be noticeable in quiet growing spaces.
- The listed 15A draw requires careful circuit planning.
Best for: Growers with a small greenhouse or grow tent who want a digital temperature display and automatic power control.
Not ideal for: Buyers heating a larger greenhouse, those who need a stated water-resistance rating for damp placement, or anyone especially sensitive to fan noise.
Bottom line: We recommend the SmterCon for compact greenhouse owners who value automatic temperature control and can work within its stated coverage.
“We recommend the SmterCon for compact greenhouse owners who value automatic temperature control and can work within its stated coverage.”
VEVOR Greenhouse Heater, 1500W Electric Space Heater with Thermostat, Fan & High Heat Modes, 25° Adjustable Angle, IPX4 & Overhea…
VEVOR stands out among these options for the combination of 25-degree angle adjustment and an IPX4 water-resistance rating. The angle gives growers some control over where warm air is directed, which can help when a heater must sit beside benches or equipment. IPX4 is the strongest stated water protection in this lineup, exceeding the two-pack’s IP21 rating, though it does not mean the heater can be left exposed to rain. Like the SmterCon, it is a single 1500W unit; the product information does not provide a specific greenhouse coverage figure.Its two modes combine high heat with fan operation, so it can provide air circulation when active. That is less flexible than the two-pack’s high, low, and fan-only settings, and the included thermostat description gives less detail than SmterCon’s digital display and automatic power control. At 7.1 pounds, it is portable with a handle but heavier than a very lightweight accessory; frequent repositioning may be a chore. We would choose it when orientation and splash resistance matter more than precise digital monitoring or multiple units. Buyers should still place it under cover and follow the product’s electrical and clearance instructions.
Pros:
- IPX4 rating is the highest stated water-resistance level among these three options.
- A 25-degree adjustable angle helps direct airflow around greenhouse layouts.
- Includes thermostat, fan, and high-heat modes.
- Portable handle and stable base support relocation between spaces.
Cons:
- At 7.1 pounds, frequent moving may feel cumbersome.
- No specific coverage area is supplied in the product details.
- The stated modes offer less flexibility than the two-pack’s three settings.
Best for: Growers who want one portable heater with adjustable airflow direction and a stronger stated water-resistance rating.
Not ideal for: Those needing a defined coverage estimate, low-heat and fan-only modes, or more detailed digital climate monitoring.
Bottom line: We would choose VEVOR when a single greenhouse heater needs flexible direction and better splash protection, while accepting less detailed control information.
“We would choose VEVOR when a single greenhouse heater needs flexible direction and better splash protection, while accepting less detailed control information.”
1500W Greenhouse Heater with Thermostat, 2 Pack, Green
This set is the most involved option in the roundup: it includes two 1500W heater fans, digital thermostats, and a separate thermohygrometer. That combination suits growers who want to monitor both temperature and humidity or position heaters at different points in a greenhouse. The 90-degree rotatable airflow and raised brackets add placement flexibility. Its low, high, and fan-only modes also provide more operating choices than the two-mode VEVOR, including circulation without heating.More equipment brings planning responsibilities. The stated maximum is 1500W per heater, so running both at full power can demand substantially more electricity than using either single-unit alternative; check circuit capacity and product instructions before operating them together. The set’s IP21 rating offers limited water protection and is below VEVOR’s IPX4, so these units need a sheltered position away from direct rain and splashes. Its ±1°F thermostat accuracy is a useful stated control specification, but the product details do not give a coverage area. Compared with SmterCon’s simpler single-heater setup, this set offers better monitoring and potential distribution across zones, at the cost of more devices, electrical planning, and stricter placement needs.
Pros:
- Two heater fans support placement in separate areas.
- High, low, and fan-only modes offer more operating flexibility than the single-unit picks.
- Digital thermostats and a thermohygrometer provide temperature and humidity information.
- 90-degree airflow rotation helps direct heat around the growing area.
Cons:
- IP21 protection is limited, so direct rain exposure is unsuitable.
- Operating both heaters at full power requires careful electrical-load planning.
- No coverage area is provided in the supplied details.
Best for: Growers who want two heater units, multiple heat modes, and separate temperature and humidity monitoring.
Not ideal for: Those with limited circuit capacity, a greenhouse exposed to rain or splashes, or a compact setup that does not need two heaters.
Bottom line: We recommend this set for growers who need two-point heating and climate monitoring, provided they can keep the units sheltered and support their electrical load.
“We recommend this set for growers who need two-point heating and climate monitoring, provided they can keep the units sheltered and support their electrical load.”
As an Amazon Associate we earn from qualifying purchases.
Before You Start
Set the target temperature based on the most cold-sensitive plants in the greenhouse, not the warmest daytime reading. A heater maintains warmth; it may not protect plants if the greenhouse loses heat faster than the unit can replace it. Keep heaters away from water, foliage, plastic, stored fuel, and anything that can burn. Never use an unvented fuel-burning heater in an enclosed greenhouse unless its manufacturer specifically approves that use and provides the required ventilation instructions.
Step-by-Step Instructions
Step 1: Measure the greenhouse and set a temperature target
Measure the greenhouse’s length, width, and height. Record its glazing type, insulation, drafts, and coldest expected outdoor temperature. Write down the minimum overnight temperature your plants need. Use these measurements and site details with a reliable heater-sizing guide or supplier to estimate the required heat output; do not size a heater by floor area alone.
Tip:Thin glazing, gaps around doors, and exposed locations increase heat loss. A heater that is too small may run continuously without reaching the target.
Check: You have a written overnight temperature target and the measurements and site details needed to select a heater.
Step 2: Choose a heater suited to the site
Compare electric, gas, and paraffin models against the greenhouse size, available power or fuel, ventilation needs, and your ability to monitor the equipment. Select a unit rated for greenhouse use, with a thermostat and safety shutoff where available. Before buying, confirm the manufacturer’s specified output, clearances, environmental rating, and installation requirements.
Tip:Electric heaters avoid combustion gases but need a suitable circuit and protection from moisture. Fuel-burning models need the ventilation and clearances stated by their manufacturer.
Check: The selected heater can meet the estimated heat demand and is compatible with the greenhouse’s power or fuel supply.
Step 3: Prepare the greenhouse and heater location
Clear plant debris and clutter, repair obvious drafts where practical, and select a stable, level location that meets the heater’s clearance requirements. Position the heater so warm air can circulate through the growing area without blowing directly onto plants. Keep it clear of doors, walkways, watering equipment, and combustible materials.
Tip:Do not place a heater where condensation or irrigation spray can reach electrical parts. Do not cover the heater or use it to dry clothing or tools.
Check: The heater has a stable location with the required clear space, and air can move around the greenhouse.
Step 4: Connect or install the heater as directed
Follow the unit’s manual from start to finish. Plug in an electric heater only to a properly rated, grounded outlet and circuit; avoid daisy-chained adapters and extension leads unless the manufacturer permits a correctly rated lead. Have a qualified professional install fixed wiring, gas connections, or flues. For fuel-burning equipment, provide the specified ventilation and use only the approved fuel.
Tip:Disconnect power before moving or cleaning an electric heater. Store fuel in approved containers away from heat and ignition sources.
Check: Connections are secure, the unit is stable, and all manufacturer-required ventilation, clearances, and safety devices are in place.
Step 5: Set the thermostat and place a thermometer
Set the thermostat to the minimum temperature your plants need, using the manufacturer’s controls. Place a separate thermometer or remote sensor near plant height, away from the heater’s direct airflow, glazing, and cold drafts. Add sensors in areas most likely to be cold if the greenhouse has distinct zones.
Tip:A sensor beside the heater can read warmer than the rest of the greenhouse and make the thermostat stop heating too soon.
Check: The thermostat has a clear setpoint, and the thermometer measures conditions where the plants are growing.
Step 6: Run the heater and check temperature coverage
Operate the heater according to its manual and observe it during the first heating cycle. After the greenhouse has had time to warm, check the thermometer and compare readings at the far end and near the most vulnerable plants. Adjust the heater or add a fan only if the manufacturer permits it and the fan is safely positioned.
Tip:Do not leave a new or recently moved heater unattended until you have checked its operation and surrounding clearances.
Check: The unit cycles as expected, the greenhouse approaches the target, and readings across the growing area do not show a damaging cold pocket.
Step 7: Monitor overnight and refine the setup
Record minimum and maximum temperatures for several cold nights. Check whether the heater reaches the setpoint, how often it runs, and whether any area falls below the plant-safe minimum. If temperatures remain low, check for drafts, verify the thermostat sensor location, and reassess heater capacity before raising the setpoint substantially.
Tip:Keep a backup plan for severe cold, such as moving sensitive plants to a protected space. Do not place improvised heat sources near plants.
Check: Overnight readings stay within the plants’ safe range, and the heater operates without unusual smells, sounds, hot surfaces near combustibles, or repeated safety shutoffs.
Common Mistakes to Avoid
- Choosing a heater based only on greenhouse floor area. — Account for glazing, drafts, greenhouse height, local cold conditions, and the target temperature when estimating heat output.
- Putting the thermostat sensor beside the heater or in direct airflow. — Measure at plant height in a representative location away from the heater, glazing, and drafts.
- Using an extension cord, outlet, or circuit that cannot handle the heater’s load. — Check the heater’s electrical rating and manual; have an electrician assess uncertain wiring or circuit capacity.
- Using a fuel-burning heater without the required ventilation. — Follow the exact ventilation and installation instructions, and use only a model approved for the setting.
Troubleshooting
Problem: The greenhouse does not reach the thermostat setting.
Solution: Check that the heater is on the correct setting, the sensor is positioned correctly, doors and vents are closed as intended, and drafts are reduced. If it still falls short, reassess heat loss and heater capacity; do not bypass safety controls.
Problem: Plants near the heater are warm while distant plants are cold.
Solution: Move the heater to improve circulation while retaining required clearances. Check temperatures in several locations and use a manufacturer-approved circulation fan if needed.
Problem: The heater switches off unexpectedly or trips a breaker.
Solution: Turn it off and allow it to cool. Check for blocked air inlets, moisture, an overloaded circuit, or a fault described in the manual. Do not keep resetting a breaker or safety cutoff; arrange qualified service if the cause is unclear.
Problem: A fuel-burning heater produces unusual odor, soot, or symptoms such as headache or dizziness.
Solution: Leave the greenhouse and get fresh air. Turn off the unit only if you can do so safely, then contact emergency or qualified service help. Do not operate it again until the cause and ventilation are checked.
What Success Looks Like
The heater runs according to its instructions, the thermostat responds to the sensor in the growing area, and recorded overnight temperatures remain within the plants’ required range. The unit has the required clearances and ventilation, with no signs of overheating, fuel leakage, soot, or electrical trouble.
Next Steps
Check the heater and thermometer regularly, remove dust only as the manual directs, and inspect cords, plugs, fuel connections, and ventilation before each cold season. Record overnight lows and adjust the setup when you add plants, alter glazing, or change the greenhouse layout. Arrange service if a safety device repeatedly trips or the unit shows damage.
Frequently Asked Questions
What temperature should I set for a greenhouse heater?
Use the minimum overnight temperature required by the most cold-sensitive plants you are protecting. Plant needs vary, so check reliable care guidance for each crop and monitor temperatures at plant height.
Can I use a household space heater in a greenhouse?
Only if its manufacturer permits greenhouse use and the unit can be kept dry, stable, and clear of plants and combustible materials. Check its electrical rating and safety instructions before connecting it.
Do greenhouse heaters need a fan?
Not always. A fan can reduce temperature differences in a larger greenhouse, but use one rated for the environment and position it according to its instructions. Check several thermometer locations to see whether circulation is needed.
Why does the heater run all night?
Cold weather, glazing, drafts, or an undersized heater can make it run for long periods. Check the greenhouse temperature and insulation first, then compare the unit’s capacity with the heat demand. A continuous run without reaching the setpoint calls for reassessment.
Can I leave a greenhouse heater on overnight?
Follow the manufacturer’s instructions for unattended operation. Use a thermostat and safety features where available, keep the specified clearances, and monitor performance before relying on it overnight.
Fall yard work Picks

Greenworks 40V Cordless Leaf Blower/Vacuum, 505 CFM, 5.0 Ah Battery and Charger
As an affiliate, we earn on qualifying purchases.