Starting your seeds in late winter helps you get a jump on the growing season and reduces spring chaos. By timing indoor sowing based on your last frost date, preparing a warm, well-lit space, and using proper soil and watering techniques, you can extend your growing window. Avoid common timing mistakes for healthy seedlings and a smoother progression outdoors. Keep going to discover how to set up your seed-starting schedule for success.
Key Takeaways
- Determine your last frost date and work backward to schedule indoor seed starts for optimal timing.
- Prepare a warm, well-lit seed-starting space with sterilized equipment to ensure healthy germination.
- Use quality soil and maintain consistent moisture, avoiding overwatering to promote strong seedling growth.
- Time seed sowing based on seed type, germination triggers, and environmental conditions to prevent early or late starts.
- Incorporate holistic practices like soil amendments and pest management to boost plant resilience and extend the growing season.
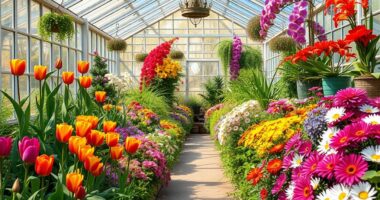
Why Starting Seeds in Late Winter Sets Your Garden Up for Success

Starting seeds in late winter gives your plants a head start before the outdoor growing season begins. Proper soil preparation is essential; guarantee your seed-starting mix is nutrient-rich, well-draining, and free of pests or disease. This creates an ideal environment for germination and strong early growth. Additionally, early seed-starting allows you to implement pest management strategies proactively. By starting indoors, you can monitor and control pests more effectively, reducing the risk of infestations that could damage young seedlings once they’re outdoors. Taking these steps sets a solid foundation for healthy plants. With prepared soil and vigilant pest management, your seedlings will develop robust roots and vibrant growth, giving you a confident start to a productive garden season. Tool maintenance ensures your equipment operates reliably during these early stages.
How to Choose the Right Dates to Start Your Seeds

To choose the right dates to start your seeds, you need to know your last frost date and how it affects planting. Match your seed types’ growth requirements with that timeline to make certain seedlings are ready at the right time. Planning carefully helps you avoid frost damage and gives your plants the best start. Leveraging innovative cloud solutions can also streamline your gardening planning by providing reliable weather data and scheduling tools.
Assess Last Frost Date
Knowing your last expected frost date is essential because it determines the best time to start your seeds indoors. To accurately assess this date, consider local weather data and historical patterns. Soil testing helps you identify soil conditions, ensuring your early seedlings won’t be affected by poor soil quality or pests. Additionally, plan for pest control measures before planting to minimize damage. Use this table to compare key factors:
| Factor | Tips |
|---|---|
| Last Frost Date | Check local extension office or weather sites |
| Soil Testing | Test soil pH and nutrients ahead of seed starting |
| Pest Control | Implement early pest prevention strategies |
| Weather Patterns | Monitor seasonal trends for unexpected frosts |
| Indoor Conditions | Ensure consistent temperature and humidity for seedlings |
This approach helps you pick the right window for starting seeds, avoiding spring chaos. Additionally, understanding soil testing can help you optimize growing conditions for healthier plants.
Match Seed Requirements
Matching seed requirements with your planting schedule is essential for healthy growth and a successful harvest. To do this effectively, consider these key factors:
- Seed compatibility: Make certain the seeds you select are suitable for your climate and growing conditions.
- Germination requirements: Know the ideal soil temperature, light, and moisture needed for your seeds to sprout.
- Timing: Start seeds when the environment aligns with their germination needs, avoiding early or late planting.
What Factors Affect Your Seed-Starting Timing (Frost Dates, Seed Type)

Your seed-starting schedule hinges on two main factors: frost dates and seed type. Frost dates determine when it’s safe to transplant seedlings outdoors without frost damage, so knowing your last spring frost helps you time your start accurately. Seed type influences when you should start; some seeds need longer to reach seed maturity, while others mature quickly. Proper seed storage ensures your seeds stay viable until planting time, preserving their germination potential. For example, warm-season crops need to be started after the danger of frost passes, while cold-hardy varieties can be sown earlier. Understanding these factors helps you avoid premature planting or delays, giving your plants the best chance to thrive. Additionally, considering Free Floating techniques can help you make the most of your seed-starting schedule in unpredictable weather. Adjust your timeline based on local conditions and seed characteristics for a smooth start.
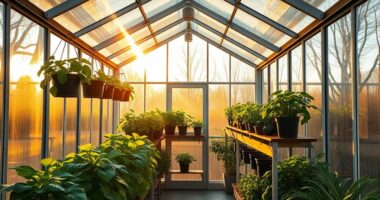
How to Prepare Your Seed-Starting Space for Healthy Growth
To give your seedlings the best start, choose a space that’s bright and warm, ensuring they get plenty of light and consistent warmth. Clean and sterilize your equipment to prevent diseases and pests from taking hold. Keep the area well-ventilated and control airflow to promote healthy growth and prevent mold. Incorporating Support Breakfast options into your routine can also help maintain energy levels during busy planting seasons.
Choose Bright, Warm Location
Have you chosen a spot in your home that offers plenty of natural light and warmth? Ensuring your seed-starting area has adequate sunlight exposure is essential for healthy growth. A bright windowsill or a sunlit corner works well. To optimize this space, focus on these key factors:
- Maximize sunlight exposure to prevent legginess.
- Maintain consistent temperature control to keep seeds comfortable.
- Keep the area free of drafts or cold spots that could hinder germination.
- Consider using supplemental grow lights if natural light is limited to ensure robust seedling development.
Clean and Sterilize Equipment
Before starting your seed trays, it’s essential to clean and sterilize all your equipment. Proper equipment cleaning prevents the spread of diseases and pests that can sabotage your seedlings. Use soap and water to scrub trays, pots, and tools thoroughly, removing dirt and debris. For soil sterilization, consider steaming or baking soil to eliminate harmful bacteria, fungi, and weed seeds. Sterilized soil creates a healthy environment, reducing the risk of damping-off disease and other issues. Disinfect seed-starting containers with a diluted bleach solution or a commercial sterilizer, then rinse well to avoid chemical residue. Keeping your equipment and soil sterile guarantees a clean, healthy start for your seedlings, giving them the best chance to grow strong and vibrant. Incorporating visual cues can also enhance your sterilization process, ensuring you don’t miss any contaminated surfaces.
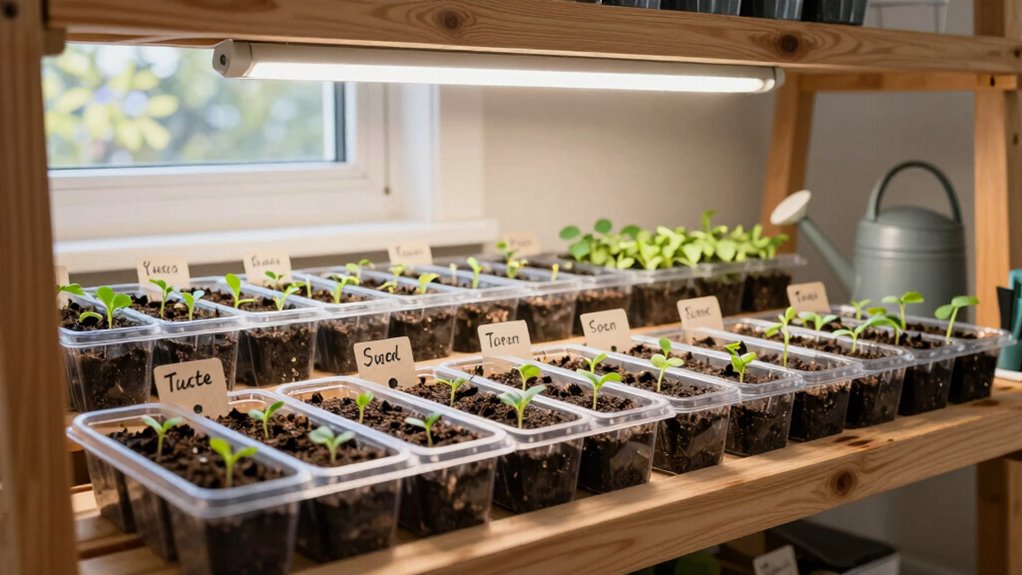
Regulate Light and Airflow
Ensuring your seed-starting space has proper light and airflow is crucial for healthy seedling development. Proper light regulation prevents leggy, weak stems, while airflow management reduces disease risk. To optimize conditions, consider these key steps:
- Adjust Light Intensity: Use grow lights at the correct height and duration to promote strong growth without overheating seedlings.
- Ensure Even Distribution: Position lights and fans to create uniform light and airflow, preventing uneven growth or damp spots.
- Manage Ventilation: Incorporate gentle fans or open vents to promote fresh air exchange, reducing humidity and mold risk. Additionally, understanding airflow management can help prevent fungal diseases and promote robust plant development.
Making a Seed-Starting Schedule That Works

Creating a seed-starting schedule that works begins with understanding your local last frost date and working backwards to determine when to sow your seeds. Once you have that date, you can plan your soil preparation, guaranteeing your containers or beds are ready for planting. Use quality soil, mix in compost, and guarantee proper drainage. Consistent watering techniques are essential—moisten the soil evenly without overwatering. Keep the soil moist but not soggy to promote healthy seed germination. Set a timeline for starting different crops based on their growth needs, factoring in indoor sprouting or direct sowing. By aligning your schedule with your climate and maintaining good soil and watering habits, you’ll minimize chaos and create a smooth, successful seed-starting process. Incorporating holistic approaches can further improve your gardening success and overall wellness.
Common Timing Mistakes and How to Avoid Them

One of the most common timing mistakes gardeners make is starting seeds too early or too late, which can lead to poor germination or weak seedlings. To avoid this, understand that many seeds require specific germination triggers like temperature or moisture, and some have seed dormancy that needs breaking. Misjudging these factors can delay sprouting or cause seeds to rot. Recognizing the importance of seed-specific needs can help you schedule planting more accurately.
Consider these key points:
- Starting too early ignores seed dormancy, risking weak seedlings before outdoor conditions are ideal.
- Starting too late misses optimal germination triggers, reducing the growing season.
- Ignoring seed-specific needs can disrupt the timing, affecting overall plant health.
Timing correctly ensures seeds sprout when conditions favor strong growth, avoiding unnecessary setbacks.
Extending Your Growing Season With Proper Seed Starting Timing

Starting your seeds at the right time can considerably extend your growing season and give your plants a head start before outdoor conditions are ideal. Proper seed starting timing guarantees your plants develop strong roots early on, allowing you to harvest longer. Use soil amendments to improve soil fertility and drainage, creating an excellent environment for seedlings. This proactive approach also helps reduce pest problems by keeping plants healthier and more resilient. Starting indoors or in protected environments minimizes pest management challenges, preventing pests from establishing early. By timing your seed starts carefully, you can maximize the growing window, avoid early planting mistakes, and set your garden up for success. This strategic planning ultimately leads to a more productive, extended harvest.
Frequently Asked Questions
How Can I Adjust Seed-Starting Times for Unusual Weather Patterns?
To adjust seed-starting times for unusual weather patterns, you should stay flexible and monitor seasonal weather forecasts closely. Use your planting calendar as a guide, but be prepared to start seeds earlier or later based on local conditions. Consider using indoor grow lights or cold frames to extend the growing season, ensuring your seedlings thrive despite unpredictable weather. This approach helps you adapt seamlessly to changing seasonal weather patterns.
What Are the Best Tools for Tracking Seed-Starting Progress?
You should use seed starting journals to log your planting dates, germination times, and growth progress manually. Digital planning tools, like gardening apps or spreadsheets, help you track multiple variables and set reminders. Combining both methods gives you a thorough view of your seed-starting success, guarantees you stay organized, and helps you adjust timing for unusual weather patterns. This way, you’re always prepared for a smooth spring planting season.
How Do Indoor Conditions Affect Seed Germination Rates?
Did you know that proper indoor conditions can boost germination rates by up to 80%? You need to keep humidity levels steady to prevent seedlings from drying out, and guarantee consistent light exposure to promote healthy growth. Too much humidity can cause mold, while too little hampers sprouting. Adjust your environment accordingly, and you’ll see your seeds sprout faster and stronger, giving you a thriving start to spring.
Can Seed-Starting Timing Influence Pest and Disease Prevention?
Yes, seed-starting timing can influence pest prevention and disease control. When you start seeds at the right time, you give plants a healthy, strong start, making them less susceptible to pests and diseases. Early or late planting can expose seedlings to unfavorable conditions, increasing risks. Proper timing helps you develop resilient plants, reduces the need for chemical interventions, and promotes a healthier garden overall.
What Are Signs That My Seedlings Are Ready for Transplanting?
Did you know that over 80% of gardeners say timing is vital for healthy plants? When your seedlings show strong, upright stems and their first true leaves, they’re ready for transplant cues. Look for sturdy seedling health, with a firm, well-developed root system and no signs of wilting or disease. These indicators guarantee your seedlings are strong enough to thrive outside, giving you the best chance for a successful garden.
Conclusion
Starting your seeds late winter might seem risky, but with the right timing, you’ll set your garden up for a thriving spring. Don’t worry if you’re new to seed starting—just follow a schedule tailored to your frost dates and seed types. With a little preparation, you’ll avoid common mistakes and extend your growing season. Soon, you’ll enjoy fresh, healthy plants all season long—no chaos, just beautiful results.