To prepare your greenhouse for spring, start by thoroughly cleaning and sterilizing soil and containers to prevent pests and diseases. Organize your supplies, repair or replace damaged trays, and stock up on quality seed-starting mix. Plan your planting schedule, label trays clearly, and set up grow lights if needed. Consider incorporating automated systems for watering and climate control. Keep your workspace efficient—hearing more about each step will help you guarantee a successful season.
Key Takeaways
- Sterilize soil and containers to prevent pests and diseases, ensuring healthy seedling growth.
- Clean and organize greenhouse space, repair damaged trays, and stock essential seed-starting supplies.
- Develop a detailed planting schedule, label trays, and set up grow lights for optimal germination.
- Review seed inventory, discard expired seeds, and order new stock to prepare for the season.
- Explore automated watering and climate control systems to streamline greenhouse management.

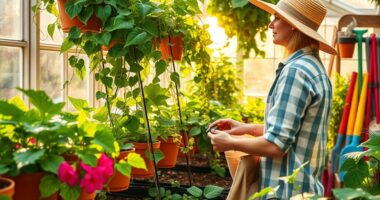
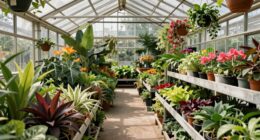
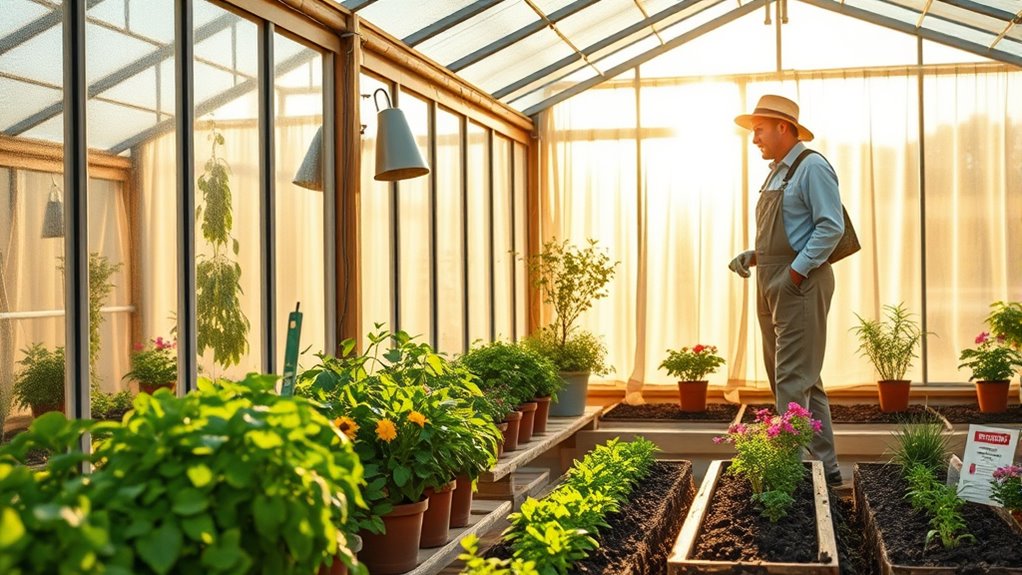
Are you ready to get your greenhouse prepared for the spring season? Now’s the perfect time to clean, organize, and plan so you can hit the ground running when the weather warms up. One of your first tasks should be soil sterilization. Over the past year, your soil may have accumulated pests, diseases, and leftover plant debris that can hinder new growth. To give your plants the best start, thoroughly sterilize the soil before planting. You can do this by steaming or solarizing it, which kills off harmful pathogens without chemicals. If you’re using containers or pots, disinfect them with a diluted bleach solution or hot water to prevent any lingering diseases from spreading. This step guarantees that your seed starting efforts will be successful and that your seedlings grow healthy and robust in a clean environment.
Get your greenhouse ready: sterilize soil and clean containers for healthy spring planting.
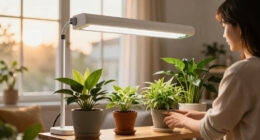
As you prepare for seed starting, it’s important to set up your workspace efficiently. Clear out any clutter, repair or replace damaged trays, and stock up on quality seed-starting mix. Starting seeds indoors gives you a head start on the growing season, so take time to plan which varieties you want to grow. Think about the timing—some plants need to be started early, while others can be sown directly into the ground later. Label your seed trays clearly to keep track of different varieties, and consider investing in grow lights if natural sunlight isn’t sufficient. This way, you’ll have a controlled environment that promotes healthy germination.
While planning, also review your existing supplies and storage. Check your watering cans, fertilization tools, and any heating mats or humidifiers you might need. Organize everything so it’s accessible and ready for use. This prep work helps you avoid last-minute scrambling once planting time arrives. Take stock of your seed inventory, discard expired seeds, and order new ones if necessary. Mapping out your planting schedule now will help you stay on track, ensuring you don’t miss ideal planting windows. Remember, early planning can make a significant difference in your success and reduce stress later on.
Additionally, exploring innovative solutions such as automated watering systems or climate control devices can greatly enhance your greenhouse management. Making a planting calendar and jotting down notes about your plans can also streamline your efforts. With your soil sterilized and your seed starting setup ready, you’ll be well-positioned to nurture a thriving greenhouse this spring. Being organized and prepared now means less hassle later, giving you more time to enjoy watching your plants grow and flourish. So, immerse yourself in your prep work with enthusiasm—you’re setting the stage for a productive, beautiful season ahead.
soil sterilizer for greenhouse
As an affiliate, we earn on qualifying purchases.
As an affiliate, we earn on qualifying purchases.
Frequently Asked Questions
When Is the Best Time to Start Spring Greenhouse Cleaning?
You should start spring greenhouse cleaning as soon as the weather warms up, ideally before your seasonal planting begins. This allows you to thoroughly disinfect surfaces, remove debris, and perform equipment maintenance. By cleaning early, you make certain of a healthy environment for your plants and prevent pests or diseases. Plus, it gives you plenty of time to organize tools and plan your planting schedule for a successful season ahead.
What Eco-Friendly Cleaning Products Are Safe for Greenhouse Surfaces?
Your greenhouse is a fortress of life, so choose eco-friendly cleaning products that are safe for surfaces. Organic disinfectants and biodegradable cleaners are perfect—they effectively sanitize without harming plants or the environment. Look for natural options like vinegar, baking soda, or plant-based solutions, which are gentle yet powerful. These eco-friendly choices keep your greenhouse pristine and thriving, ensuring a healthy start to the new season.
How Often Should Greenhouse Vents and Fans Be Inspected?
You should inspect your greenhouse vents and fans at least once a month to make certain proper vent maintenance and airflow. Regular fan inspection schedules help prevent dust buildup and mechanical issues, keeping your system running efficiently. During each inspection, check for debris, wear, or damage, and clean or repair as needed. Consistent maintenance minimizes the risk of ventilation problems, promoting healthy plant growth throughout the season.
What Are Common Pests to Watch for During Spring?
Like watchful sentinels, you should stay alert for common pests such as aphids, whiteflies, spider mites, and fungus gnats during spring. Proper pest identification helps you catch issues early, preventing infestations. Implement pest prevention strategies like maintaining good airflow, removing dead plant material, and inspecting new plants before introducing them. Regular monitoring keeps pests at bay, ensuring your greenhouse stays healthy and thriving all season long.
How Can I Improve Greenhouse Insulation for Early Spring?
To improve your greenhouse insulation for early spring, consider installing double glazing to reduce heat loss and keep your plants warm. Additionally, use thermal curtains at night to retain warm air and prevent drafts. You can also add mulch around plants and seal any gaps or cracks in the structure. These steps help maintain a stable temperature, ensuring your plants thrive despite the cooler early spring weather.

DYMOND BoostGro LED Seed Starter Grow Light Full Spectrum Linkable 5000k Daylight + 660nm Red + 450nm Blue Indoor Plant Lighting Fixture (2 FT, Black)
FULL SPECTRUM: BoostGro’s Grow Lights can imitate the spectrum of sunlight giving your plants the perfect quality of…
As an affiliate, we earn on qualifying purchases.
As an affiliate, we earn on qualifying purchases.
Conclusion
Now that you’ve cleaned and planned your greenhouse, you’re ready to hit the ground running this season. Proper prep sets the stage for a bountiful harvest and a thriving garden. Remember, a little effort now will pay off big later—don’t let this opportunity slip through your fingers. With your hard work and dedication, you’ll be able to watch your plants flourish and enjoy the fruits of your labor. The sky’s the limit—seize the moment!

HEKIWAY 60Ft Drip Irrigation System with Smart Water Timer – Automatic Garden Watering Kit with Solid Brass Metal Connectors, 360° Adjustable Nozzles & Bendable Tubing for Garden, Greenhouse & Lawn
🔹 [Smart Timer Included – Hands-Free Watering, Fully Programmable | 2026 Upgraded]No more daily hose duty. The built-in…
As an affiliate, we earn on qualifying purchases.
As an affiliate, we earn on qualifying purchases.

Inkbird ITC-308 Digital Temperature Controller 2-Stage Outlet Thermostat Heating and Cooling Mode Carboy Homebrew Fermenter Greenhouse Terrarium 110V 10A 1100W
【Easy to use】 Supports °C/°F display.
As an affiliate, we earn on qualifying purchases.
As an affiliate, we earn on qualifying purchases.