
Automatic vents can fail because dirt buildup, debris, and environmental factors like moisture or corrosion clog or damage mechanical parts. Proper installation, regular cleaning, lubrication, and inspections help prevent issues like gear wear and rust. Addressing minor problems early extends vent life and improves performance. If you want to know more about keeping your vent working smoothly and avoiding costly repairs, keep exploring ways to maintain and troubleshoot effectively.
Key Takeaways
- Regularly clean vents to remove dirt, debris, and dust that can clog moving parts and impair operation.
- Inspect and lubricate mechanical components like gears and springs to prevent wear, rust, and mechanical failure.
- Ensure proper installation, alignment, and secure fastening to avoid misoperation and reduce stress on parts.
- Protect vents from moisture and harsh weather conditions to prevent corrosion and material deterioration.
- Monitor for signs of malfunction such as unusual noises, leaks, or physical damage, and seek professional repair when needed.
What Causes Automatic Vents to Fail?
Automatic vents can fail when debris or dirt build up inside them, blocking the movement of the vent’s internal components. The vent material plays a vital role here—some materials are more resistant to dirt and corrosion, reducing failure risks. Poor vent design can also contribute; vents with complicated or narrow pathways are more prone to clogging and difficulty cleaning. If the vent isn’t made from durable, corrosion-resistant materials, dirt can cause the internal parts to stick or seize up. Over time, accumulated debris can prevent the vent from opening or closing properly, leading to malfunctions. Choosing a vent with a simple, effective design and high-quality, resilient materials helps minimize debris buildup, ensuring your vent operates smoothly and lasts longer. Additionally, selecting energy-efficient materials can enhance the longevity and reliability of automatic vents, especially in challenging environments.
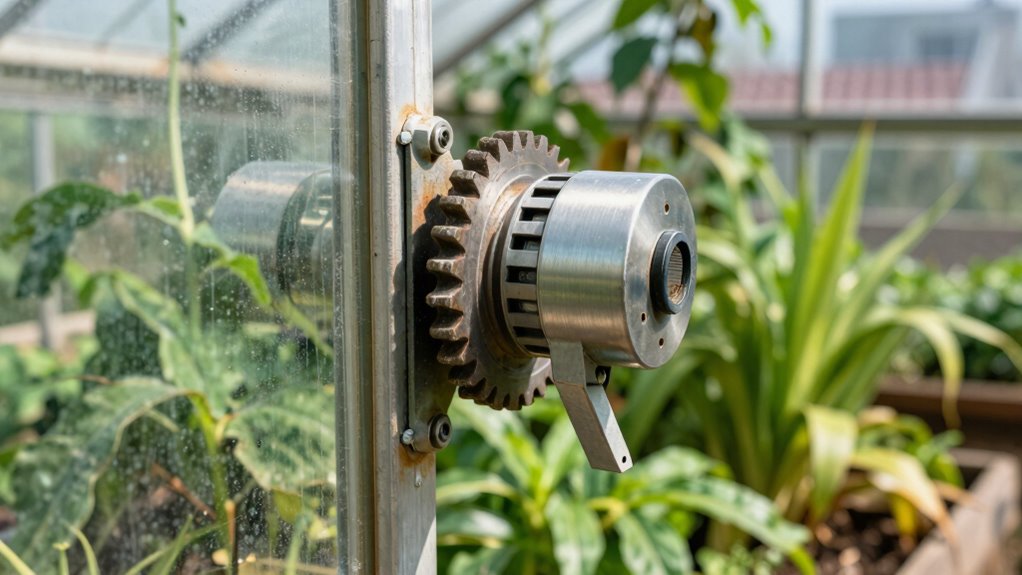
Why Proper Installation Matters for Vent Longevity

Proper installation plays a key role in ensuring your vent functions correctly and lasts longer. Poor installation can compromise the installation quality and reduce material durability, leading to premature failure. To maximize lifespan, ensure the vent is mounted securely, aligned properly, and sealed tightly. Using high-quality materials during installation also helps prevent corrosion and wear. Here’s a quick overview:
| Aspect | Importance | Tips |
|---|---|---|
| Installation Quality | Prevents misalignment and leaks | Hire experienced installers |
| Material Durability | Ensures resistance to elements | Choose corrosion-resistant parts |
| Proper Sealing | Stops water ingress | Use weatherproof sealants |
| Secure Mounting | Avoids loosening over time | Tighten fasteners appropriately |
Additionally, incorporating correct installation techniques can further enhance the vent’s longevity by reducing the risk of future issues.
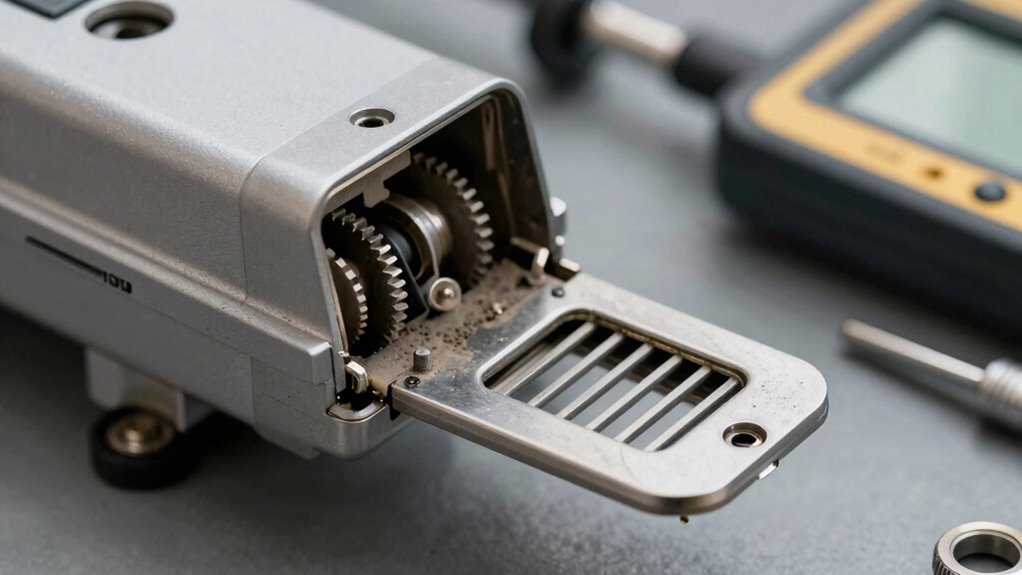
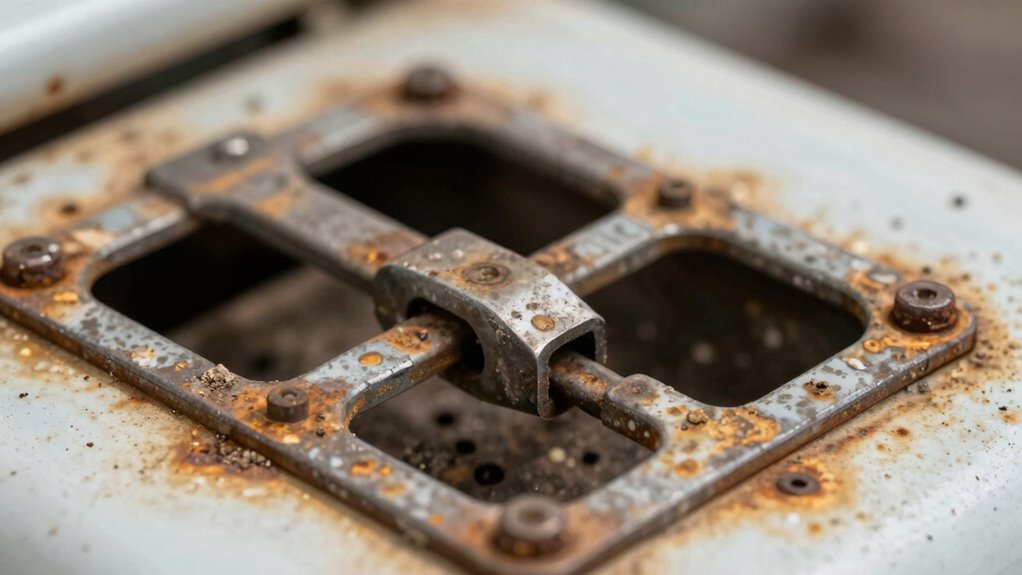
Common Mechanical Parts That Fail in Vent Openers
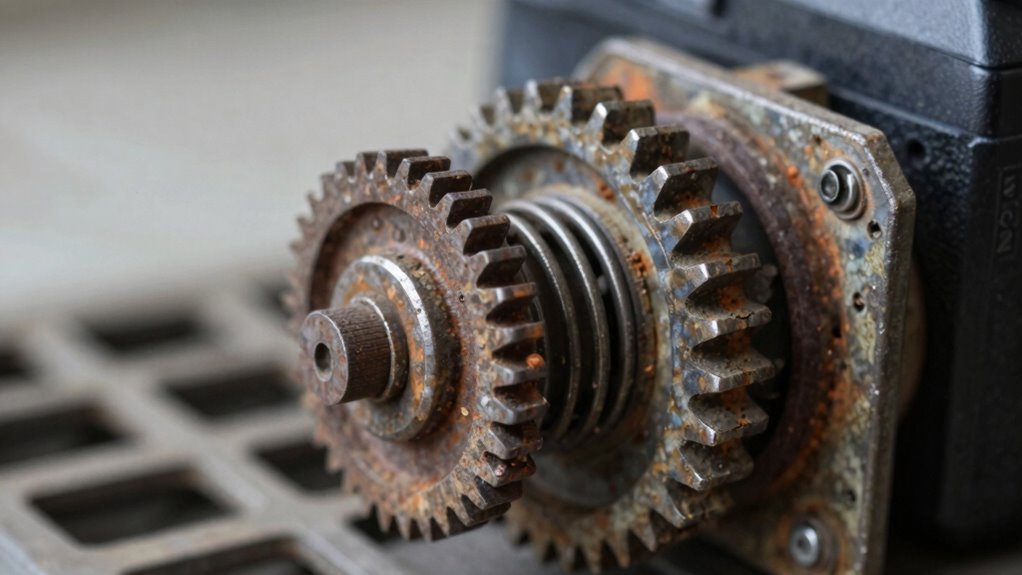
You’ll often notice gear wear and tear or spring mechanism failures as common issues in vent openers. These parts endure constant movement and stress, making them prone to breaking down over time. Keeping an eye on these components helps prevent unexpected failures and extends your vent’s lifespan. Regular inspection of mechanical parts can help identify early signs of wear before they cause complete failure.
Gear Wear and Tear
Gear wear and tear is a common issue that can cause vent openers to malfunction over time. When gears become worn, they lose their smooth operation, leading to jams or failure to open and close properly. Regular lubrication maintenance is essential to reduce friction and extend gear lifespan. Without proper lubrication, metal parts grind against each other, accelerating deterioration. Storage considerations also matter; keep your vent openers in a dry, clean environment to prevent rust and corrosion that can weaken gears. Inspect gears periodically for signs of wear, such as excessive looseness or missing teeth. Using proper lubrication techniques can significantly slow down gear degradation and improve overall operation. Addressing gear issues early can prevent more serious mechanical failures and ensure your vent opener operates smoothly for years. Proper care and maintenance are key to avoiding gear-related problems.
Spring Mechanism Failures
Have you ever noticed your vent opener struggling to open or close smoothly? That could be due to spring mechanism failures. The spring mechanism is a critical mechanical part that helps the vent open and close reliably. Over time, springs can weaken, become misaligned, or break due to constant use or corrosion. To prevent failure, inspect the spring regularly for signs of fatigue or rust, and replace it at the first sign of trouble. Proper lubrication can also help reduce wear and extend the spring’s lifespan. Regular maintenance and understanding mechanical failures are essential because a broken spring can jam the vent, leading to poor ventilation or damage to other components. Maintaining the spring mechanism ensures your vent opener functions smoothly and prolongs its overall life.
How Weather and Environment Affect Automatic Vent Performance

Weather and environmental conditions can profoundly impact the performance of automatic vents. These factors influence how well your vent operates, especially through weather impact and environmental factors. For example:
- Extreme temperatures can cause materials to expand or contract, affecting vent movement and accuracy.
- Humidity and moisture can lead to rust or corrosion, impairing the vent’s mechanical parts.
- Dust, dirt, and debris from windy conditions can clog or jam the vents, reducing efficiency.
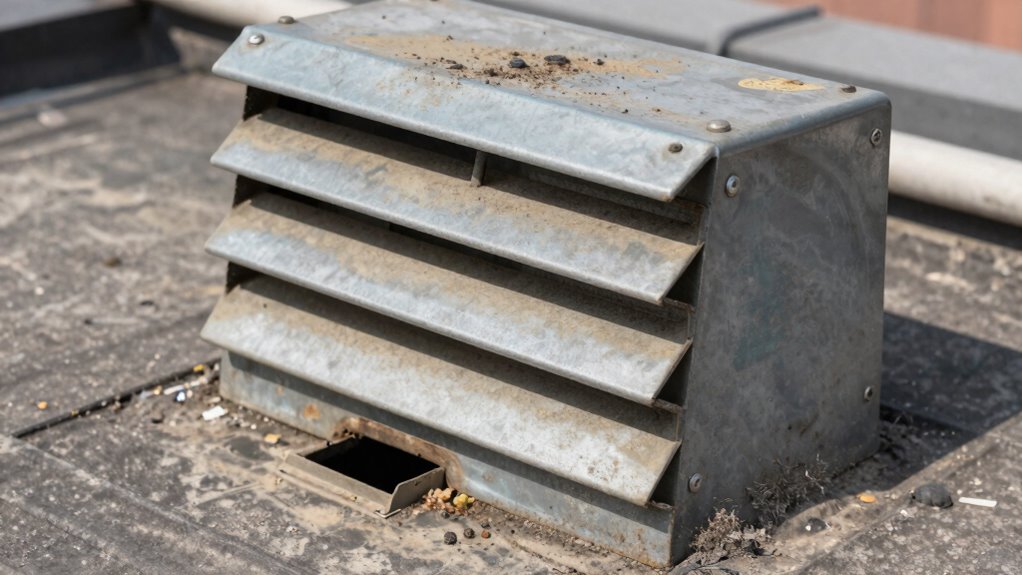
Signs Your Automatic Vent Is Not Working Properly

If your automatic vent isn’t functioning properly, it can often be noticeable through specific signs. One common indicator is inconsistent airflow, which may be caused by issues with the vent material deteriorating over time. If the vent material becomes warped or blocked, it won’t open or close correctly. Additionally, pay attention to the vent size; if it’s too small, it restricts airflow, and if it’s too large, it may struggle to regulate humidity effectively. You might also notice physical damage or debris buildup that hinders movement. These signs suggest your vent isn’t operating as intended, which can lead to poor ventilation and increased risk of failure. Recognizing these signs early helps prevent more severe problems down the line. Proper mount, OTA, and camera comparisons can also help ensure your setup maintains optimal airflow and ventilation.
How to Inspect and Clean Your Vents Regularly

Wondering how to keep your vents functioning properly? Establishing a regular inspection routine is key. Start by checking for dust, debris, or build-up around the vent openings. Next, gently remove any dirt using a soft brush or cloth, making sure not to damage the mechanism. Finally, examine the vent for signs of corrosion or wear that could affect operation. Regular vent cleaning helps prevent blockages and keeps your automatic vent working smoothly. Incorporating a preventative maintenance routine can further ensure the longevity of your vents. By sticking to this routine, you catch potential issues early and maintain ideal airflow. Remember, a simple, consistent inspection routine can prolong your vent’s lifespan and avoid costly repairs. Stay vigilant, and your vents will serve you well for years to come.
Troubleshooting Automatic Vent Problems Step-by-Step
When your automatic vent isn’t working properly, start by checking its positioning to make certain it’s aligned correctly. Next, look for any blockages that might be preventing it from opening or closing smoothly. These simple steps can often identify the root of the problem quickly. Additionally, inspecting the connected control system can help ensure the vent receives proper signals for operation.
Check Vent Positioning
Ensuring the vent is properly positioned is a vital first step in troubleshooting automatic vent problems. If the vent isn’t aligned correctly or installed at the right height, it may not open or close properly. To check this:
- Verify the vent alignment, making sure it moves smoothly without obstruction. Misalignment can hinder proper operation.
- Confirm the installation height matches manufacturer specifications. Too high or low positioning can prevent accurate sensing or movement.
- Adjust the vent if needed, ensuring it sits level and free of debris that could interfere with its movement.
- Regular inspection of automatic vent components helps identify potential issues before failure occurs.
Proper vent positioning ensures accurate function and prevents premature failure. Regularly inspecting these aspects helps maintain optimal operation and extends the lifespan of your automatic vent.
Inspect for Blockages
Have you checked the vent for any blockages that might be preventing it from opening or closing properly? Start with a thorough blockage inspection to identify any debris, dirt, or obstructions inside or around the vent. Remove any debris or buildup carefully to guarantee smooth operation. Use a brush or cloth to clear out dust or dirt lodged in the mechanisms or vents. Pay special attention to the vent’s hinge area and moving parts, as blockages here can hinder movement. Confirm that nothing is jammed or stuck, and that airflow isn’t obstructed. Regular debris removal prevents future problems, keeping your automatic vent functioning correctly. Proper blockage inspection and debris removal are vital steps to maintain ideal vent performance and avoid failure. Additionally, understanding the importance of affiliate disclosure can help you choose the right cleaning tools or replacement parts if needed.
When and How to Replace or Upgrade Vent Components

Knowing the signs that indicate it’s time to replace or upgrade your vent components can save you money and prevent further damage. Watch for these key indicators:
Recognizing signs of vent component issues helps prevent damage and costly repairs.
- Material incompatibility, such as rust or corrosion, suggests it’s time for an upgrade to prevent leaks.
- Faulty vent calibration, leading to improper opening or closing, signals the need for component replacement.
- Persistent mechanical issues or unusual noises indicate worn parts that can’t be repaired effectively.
When upgrading, ensure new parts match your existing system’s material compatibility to avoid deterioration. Regularly check and calibrate your vent to keep it functioning properly. If you notice these signs, replacing or upgrading your vent components promptly helps maintain efficiency and prevents costly damage down the line.
Tips to Prevent Corrosion and Wear in Vent Openers
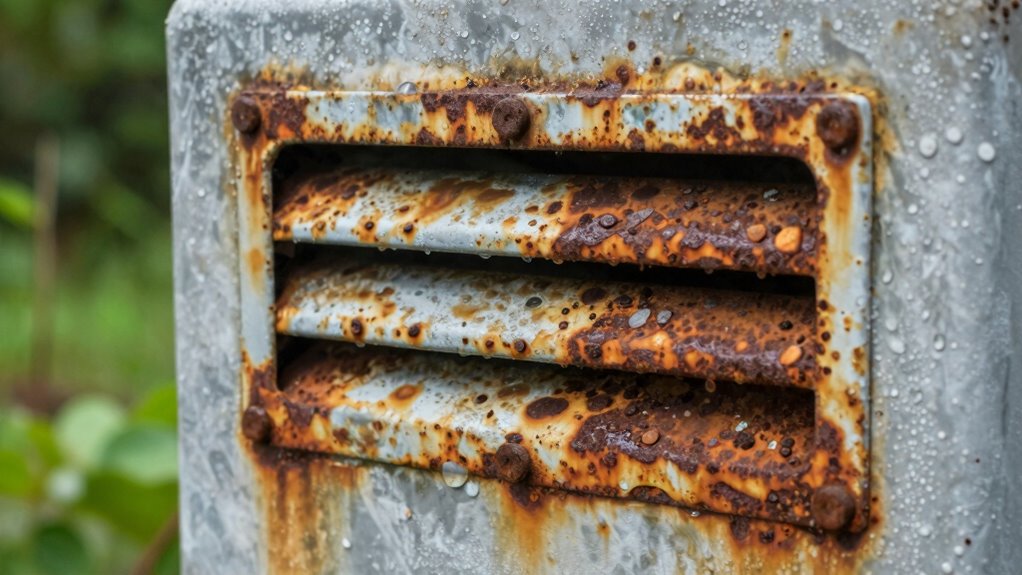
To prevent corrosion and wear in your vent openers, regular maintenance is essential. Start by cleaning the components to remove dirt, moisture, and debris that can cause corrosion. Applying a suitable lubricant is vital; use a high-quality lubricant designed for metal parts to reduce friction and prevent rust. Make sure to lubricate moving parts periodically, especially during seasonal changes or if you notice any stiffness. Corrosion prevention also involves inspecting seals and protective coatings, reapplying or repairing them as needed. Keep the vent mechanism dry by wiping away water or condensation. Consistent lubrication and cleaning extend the lifespan of your vent opener, ensuring smooth operation and reducing the risk of failure due to corrosion and wear. Proper care saves you time and repair costs in the long run.
When Should You Call a Professional for Vent Repairs?
If your vent opener keeps malfunctioning or doesn’t respond properly, it’s time to call a professional. Unusual noises or leaks can indicate serious issues that need expert attention. Also, if safety concerns arise, don’t hesitate to seek professional help to ensure everything is functioning correctly.
Persistent Vent Malfunctions
Persistent malfunctions in your vent can signal more serious issues that need professional attention. If your automatic vent isn’t opening or closing properly despite regular vent maintenance, it’s time to seek expert help. Consider calling a professional if:
- The vent remains stuck in one position despite cleaning and adjustments.
- You notice frequent, unexplained failures that interfere with airflow or pressure regulation.
- Upgrading your system with automatic vent upgrades still doesn’t resolve ongoing issues.
Ignoring these signs can lead to further damage or inefficient operation. Professional repairs ensure your vent operates smoothly and safely. They can also advise on the best automatic vent upgrades to prevent future malfunctions, saving you time and money in the long run.
Unusual Noises or Leaks
Unusual noises or leaks from your vent can indicate that something is wrong and may require professional attention. A strange vent noise, like banging or squealing, often signals a mechanical issue or debris caught inside. Leaks, especially if water drips around the vent or panels, can point to seal failures or structural damage. These leak causes can worsen if ignored, leading to water damage or mold growth. If you notice persistent or loud vent noise, or if leaks are ongoing despite attempts to tighten or clean, it’s time to call a professional. Addressing these warning signs early helps prevent more costly repairs and ensures your vent operates smoothly and safely. Don’t delay if you suspect a problem—professional repair is the safest choice.
Safety Concerns Arise
Safety concerns should prompt you to call a professional immediately when you notice signs of damage or malfunction in your vent system. Damaged vent material, such as cracks or corrosion, can pose health and fire hazards. Additionally, if the vent color has faded or changed unexpectedly, it could indicate deterioration. You should seek expert help if:
- The vent material shows visible cracks, rust, or corrosion.
- The vent no longer opens or closes properly, risking trapping harmful gases.
- The vent’s appearance, including vent color, suggests it’s compromised or deteriorating.
Ignoring these signs can lead to unsafe conditions. Prompt professional repairs ensure your system functions correctly, maintaining safety and extending the lifespan of your vent system.
Frequently Asked Questions
How Often Should Automatic Vents Be Serviced?
You should service automatic vents at least once a year to guarantee optimal performance. Regular maintenance tips include inspecting for blockages, checking for corrosion, and lubricating moving parts. If your vent shows signs of frequent failure or damage, consider replacement options to avoid costly repairs. Staying proactive with annual servicing helps prevent failures, extends the vent’s lifespan, and keeps your system running efficiently.
Can Environmental Conditions Cause Vents to Fail Prematurely?
Environmental conditions can cause vents to fail prematurely. External factors like extreme temperatures, moisture, and debris can deteriorate vent material over time. You should regularly inspect vents for signs of damage or corrosion caused by these conditions. Protect your vents by installing them in sheltered locations and performing routine maintenance to prevent external factors from compromising their functionality. Proper care guarantees your automatic vents operate efficiently and last longer.
Are There DIY Solutions to Fix Vent Opener Issues?
Your automatic vent might just be a stubborn mule, but DIY solutions can often fix it. Start with manual adjustments—check for blockages, clean vents, and lubricate moving parts. Regular DIY maintenance keeps vents running smoothly and prevents costly failures. If the problem persists, replacing the faulty components yourself can save money and time. Remember, a little effort now can prevent a vent disaster later—think of it as saving your system’s life!
What Are the Signs of Internal Corrosion in Vents?
You’ll notice internal corrosion in vents as rust or discoloration on metal surfaces, and if you see flaky or crusty buildup, it’s a sign of deterioration. Deterioration often causes vents to stick or fail to open properly. Regular inspections help catch these issues early, so you can clean or replace affected parts before corrosion worsens. Addressing internal corrosion promptly keeps your vents functioning efficiently and prevents costly repairs.
How Long Do Automatic Vent Openers Typically Last?
Think of your automatic vent opener like a trusted car battery—lasting about 3 to 5 years with proper care. On average, vent lifespan and opener durability depend on usage and maintenance. If you notice frequent failures, it’s likely time for a replacement, much like changing a worn-out battery. Regular inspections and timely maintenance can extend its life, ensuring your system keeps running smoothly without unexpected breakdowns.
Conclusion
Remember, an ounce of prevention is worth a pound of cure. Regular maintenance and paying attention to signs of trouble can keep your vent opener working smoothly. Don’t ignore small issues—they can lead to bigger, costly problems later. By understanding what causes failures and acting promptly, you’ll extend your vent’s lifespan. Stay proactive, and you’ll keep your system running efficiently for years to come. After all, a well-maintained vent is the key to peace of mind.