
If your door’s sticking and you want a quick fix, start by cleaning the hinges with a cloth to remove dirt and rust. Then, spray a light coat of lubricant, like WD-40 or silicone, onto the hinge pins. Open and close the door to work the lubricant in. This simple, five-minute trick can make your door swing smoothly again while giving your space a fresh, greenhouse-like feel. Keep exploring for more tips!
Key Takeaways
- Regularly clean and lubricate hinges with WD-40 or silicone spray to reduce rust and friction.
- Check and realign hinges to ensure proper door positioning and smooth operation.
- Remove and reapply hinge pins for thorough cleaning and lubrication if needed.
- Inspect hinges for rust, damage, or misalignment; replace broken or bent hinges promptly.
- Enhance door brightness and environment by sealing gaps, painting, or adding glass panels.

VIVOSUN GIY Smart Grow Tent Kit System 5x5 WiFi-Integrated Grow Tent Kit with Automate Ventilation Circulation, Clip Fans, Full-Spectrum LED Grow Light 645W, GrowHub E42A Controller
Kit Included: 60"x60"x80" Grow Tent; Bar LED Grow Light 645W; 8" AeroZesh G8 Fan; GrowHub E42A Controller; 6"...
As an affiliate, we earn on qualifying purchases.
Why Do Doors Get Sticky and How Do Hinges Cause the Problem?
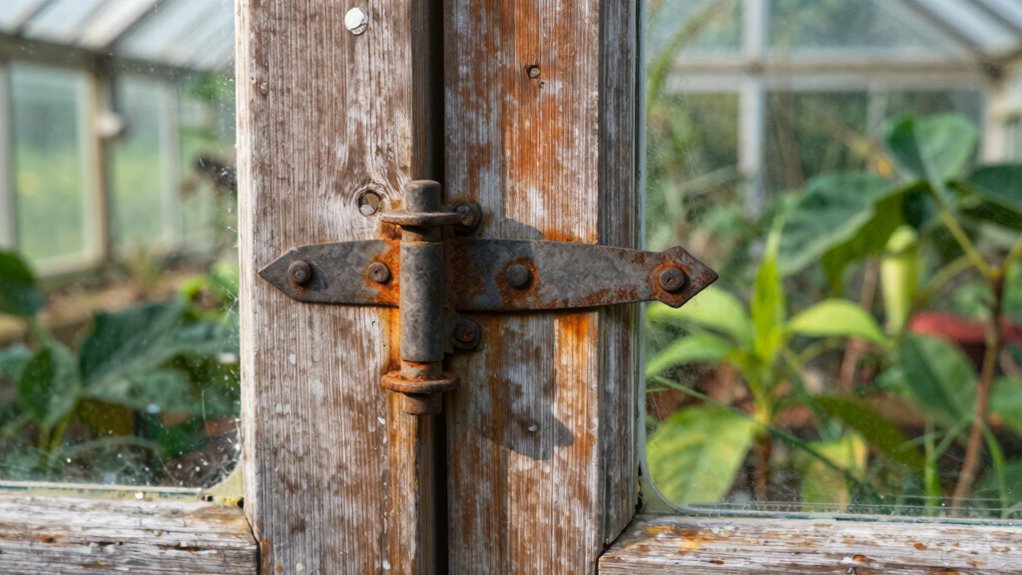
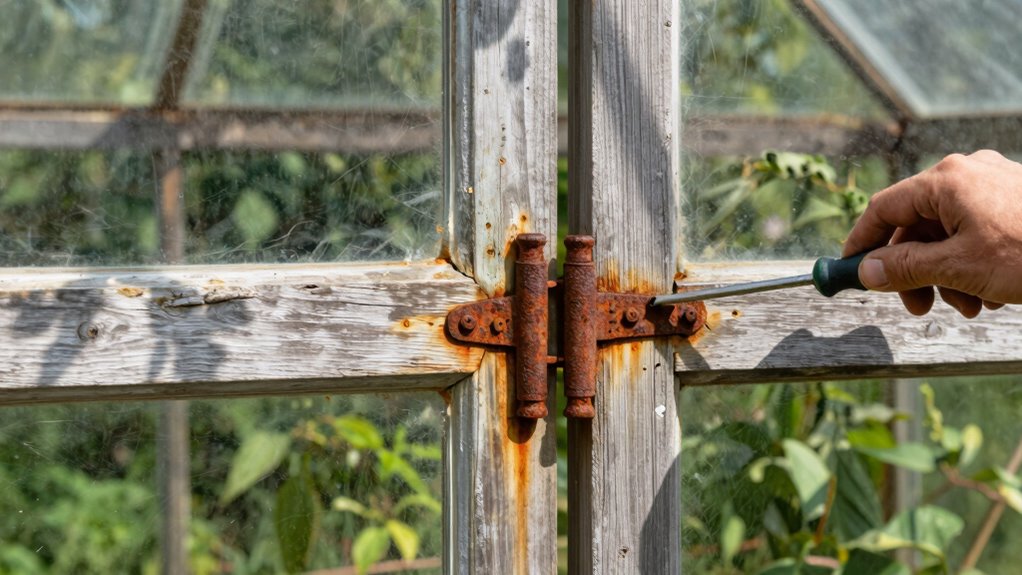
Doors often become sticky because hinges wear out or become misaligned over time. When the hinge material, whether metal or plastic, deteriorates or loosens, it affects how the door moves within the door frame. This misalignment causes the door to drag or stick, especially near the edges. Humidity and temperature changes can also cause metal hinges to expand or contract, worsening the problem. If hinges aren’t properly lubricated or become rusty, the friction increases, making the door harder to open or close smoothly. Over time, these issues lead to a warped or misaligned fit between the door and the frame, resulting in that stubborn sticking feeling. Fixing hinges or replacing worn hinge material can often restore smooth operation quickly. Additionally, precise hinge alignment is essential for ensuring the door operates smoothly and prevents sticking issues from recurring.

VIVOSUN S558 5x5 Grow Tent, 60"x60"x80" High Reflective Mylar with Observation Window and Floor Tray for Hydroponics Indoor Plant for VSF6450
Keeps All Light Inside: The Hydroponic Mylar Grow Tent is made of high-quality 600D Oxford canvas that is...
As an affiliate, we earn on qualifying purchases.
What Tools Do You Need to Fix Sticky Door Hinges Fast?

To fix sticky door hinges quickly, you’ll need just a few basic tools that are likely already in your toolbox. These tools will help you address door squeaks and hinge rust efficiently. First, grab a screwdriver—most hinges are secured with either a Phillips or flat-head screw. Next, have some lubricant like WD-40 or silicone spray on hand to loosen rust and reduce squeaks. Lastly, a clean cloth or rag is helpful for wiping away dirt and excess lubricant. With these simple tools, you can easily remove the hinge pin, apply lubricant to free up rust, and restore smooth door operation. No need for fancy equipment—just a few common tools to get the job done quickly and effectively. Additionally, understanding the proper hinge maintenance can help prevent future issues and keep your doors functioning smoothly.

AC Infinity AI Grow System PRO 5x5, 6-Plant Kit w/Self-Learning AI Controller, Dynamic Airflow & LM301H EVO LED Lighting Control, 2000D Mylar Tent w/Lab-Tested Reflectivity, Largest Zippered Window
An advanced AI grow tent kit with dynamic controls and built-in components; everything you need to achieve the...
As an affiliate, we earn on qualifying purchases.
How to Clean Your Door Hinges in Just Five Minutes
Start by gathering your cleaning supplies, like a rag, brush, and lubricant. Wipe down the hinges to remove dirt and debris, then apply a light coat of lubricant. In just five minutes, your hinges will be cleaner and ready to move smoothly. Adding proper maintenance practices helps keep hinges functioning well over time.
Gather Your Supplies
Gathering your supplies is the first step to quickly cleaning your door hinges. You’ll need a few simple tools to tackle door hardware and prepare for hinge lubrication. First, grab a soft cloth or microfiber towel to wipe away dirt and grime. Next, pick up a small screwdriver to remove the hinges if needed. Finally, have some mild cleaning solution or vinegar nearby for a thorough clean. These supplies help you efficiently remove debris and dirt buildup that cause sticky doors. Ensuring you have the right tools ready makes the process smoother and quicker. Additionally, understanding the importance of color accuracy in projectors can help you appreciate how proper cleaning and maintenance can also improve your door hinge performance. With everything in hand, you’ll be set to clean and lubricate your hinges in just five minutes, restoring smooth operation and quiet, effortless door movement.
Clean and Lubricate
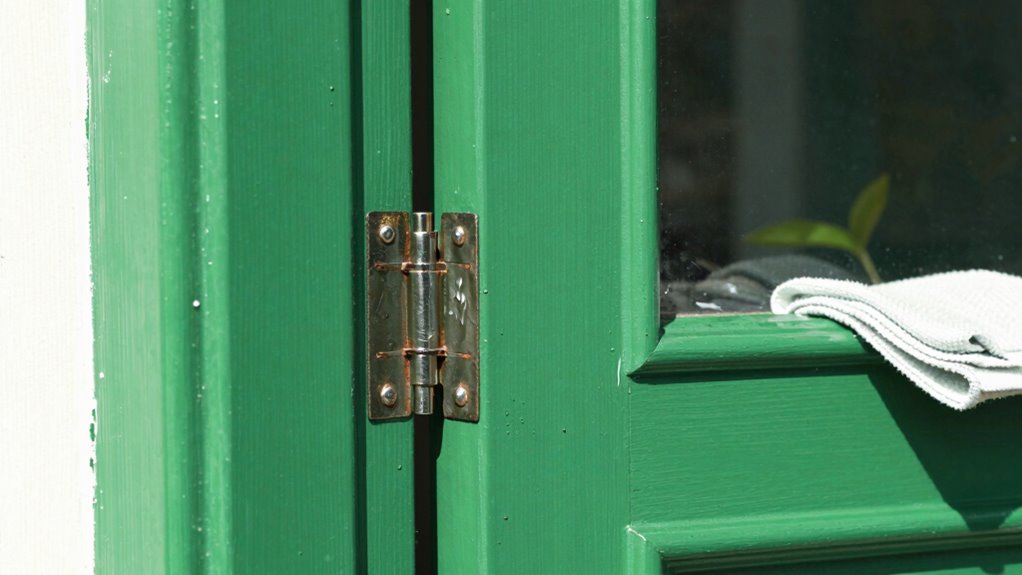
Begin by wiping down the hinges with a soft cloth or microfiber towel to remove dust, dirt, and grease. This step helps eliminate debris that can cause door squeaks and makes your hinges less prone to hinge rust. Regular cleaning and lubrication prevent squeaks and keep your hinges moving smoothly. Once clean, apply a few drops of lubricant, like WD-40 or silicone spray, directly onto the hinge pins and moving parts. Open and close the door a few times to work the lubricant in. If you notice stubborn rust, gently scrub it with a toothbrush or fine steel wool before lubricating. Proper hinge maintenance is essential for home safety and to avoid potential accidents.

Spider Farmer 5x5 Grow Tent 2025 New, 60"x60"x80",1680D Thicken Mylar Canvas, with Hook for Controller and Power Strip, Enlarged View Window for Indoor Hydroponic Growing for SF7000, SE7000, G7000
PRO-GRADE INDOOR GROW TENT: Premium SBS zippers, double protection with zipper flap and dual stitching, effectively lock the...
As an affiliate, we earn on qualifying purchases.
How to Lubricate Hinges for a Smooth, Fresh Feeling

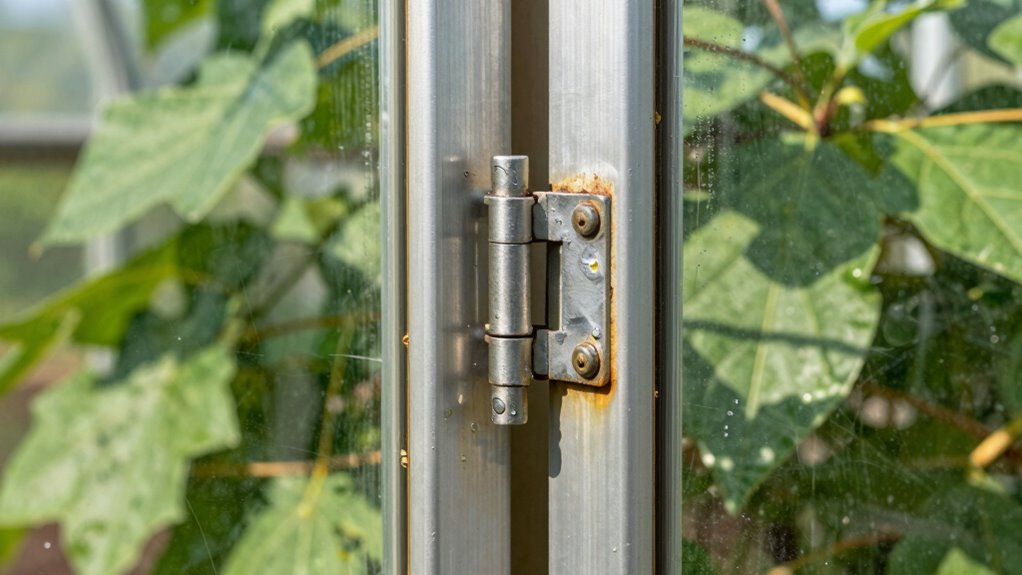
If your door squeaks or feels stiff, lubricating the hinges can restore smooth movement and eliminate noise. Start by removing the hinge pins if possible, then apply a few drops of door hinge lubrication, such as WD-40 or silicone spray, directly onto the pin and hinge joints. Move the door back and forth to work the lubricant in. This simple step is one of the best squeaky door fixes and keeps hinges working smoothly. Visualize the process with these steps:
Lubricate hinge pins with WD-40 or silicone spray to silence squeaks and ensure smooth door movement.
- Applying lubricant directly onto the hinge pin and joints
- Moving the door to distribute the lubricant evenly
- Wiping away excess to prevent drips and dirt buildup
This quick maintenance keeps your hinges functioning like new, providing a fresh, quiet feel every time you open or close. Additionally, understanding filtration options can help prolong the life of your lubricants and keep your hinges free of dirt and debris.
Prevent Your Door Hinges From Sticking Again: Easy Maintenance Tips
To keep your door hinges from sticking again, regular maintenance is key. Start by inspecting your door hardware periodically for dirt, dust, or rust. Clean the hinges with a soft cloth and a mild cleaner to remove debris that can cause sticking. After cleaning, apply a lightweight lubricant or a silicone spray to the hinge pins and moving parts to ensure smooth operation. During hinge maintenance, check for loose screws or misaligned hinges and tighten or adjust as needed. Avoid over-lubricating, which can attract more dirt. Consistent care prevents buildup that leads to sticking and extends the life of your door hardware. Additionally, understanding air purifier maintenance dos and don’ts can help you keep your environment clean and free from dust that might contribute to hinge issues. By making hinge maintenance a regular habit, you’ll keep your doors swinging freely and avoid future sticking issues.
What Common Mistakes Should You Avoid When Fixing Hinges?

When fixing hinges, don’t over-tighten screws, as this can cause damage or make the door stick worse. You also want to guarantee the hinges are properly aligned; neglecting this step can lead to uneven movement or gaps. Avoid rushing through the process, since missing these details often means you’ll need to redo the repair later.
Over-tightening Hinges
Over-tightening hinges is a common mistake that can cause more harm than good. When you tighten the screws too much, you risk damaging the hinge or the door frame. This often leads to door misalignment, making the door harder to open or close smoothly. Additionally, relying on visual cues can help you determine the correct tightness without overdoing it. Be careful not to:
- Apply excessive force when tightening screws, which can strip the threads.
- Over-tighten screws on the hinge’s knuckles, causing them to bend or crack.
- Neglect to check door alignment after tightening, which can worsen door misalignment issues.
Ignoring Proper Alignment
Ignoring proper alignment is a common mistake that can turn a simple hinge fix into a frustrating problem. When you neglect door alignment, you might find the door still sticking or swinging unevenly, even after fixing the hinges. Misaligned hinges can cause uneven hinge wear over time, worsening the issue and reducing the lifespan of your hinges. Before tightening or replacing hinges, take a moment to check if the door is hanging straight. If it’s misaligned, adjust the hinges carefully to ensure the door sits flush in the frame. Proper alignment not only improves door operation but also prevents unnecessary hinge wear. Skipping this step can lead to recurring problems, making your quick fix less effective and more time-consuming in the long run. Additionally, performing a quick seasonal checkup can help identify hinge or door alignment issues early, saving you time and effort later.
When to Replace Hinges or Call a Professional for Help
Knowing when to replace hinges or call a professional can save you time and prevent further damage. If your door remains sticky despite DIY fixes, it might be time for hinge replacement or professional repair. Consider replacing hinges if they’re visibly rusted, bent, or broken. If hinges are creaking loudly or don’t align properly even after adjustments, a professional repair can ensure the job’s done right. Also, if you notice persistent sagging or difficulty opening and closing, it’s a sign to seek expert help. Recognizing signs like art care issues can help you determine the proper maintenance steps for your doors.
How to Make Your Door Look and Feel Like New After the Fix
After fixing your door, a fresh coat of paint can instantly refresh its look. Polishing the hardware adds a sleek, new feel that makes a big difference. These small touches help your door look and feel like new again.
Fresh Paint Touch-Up
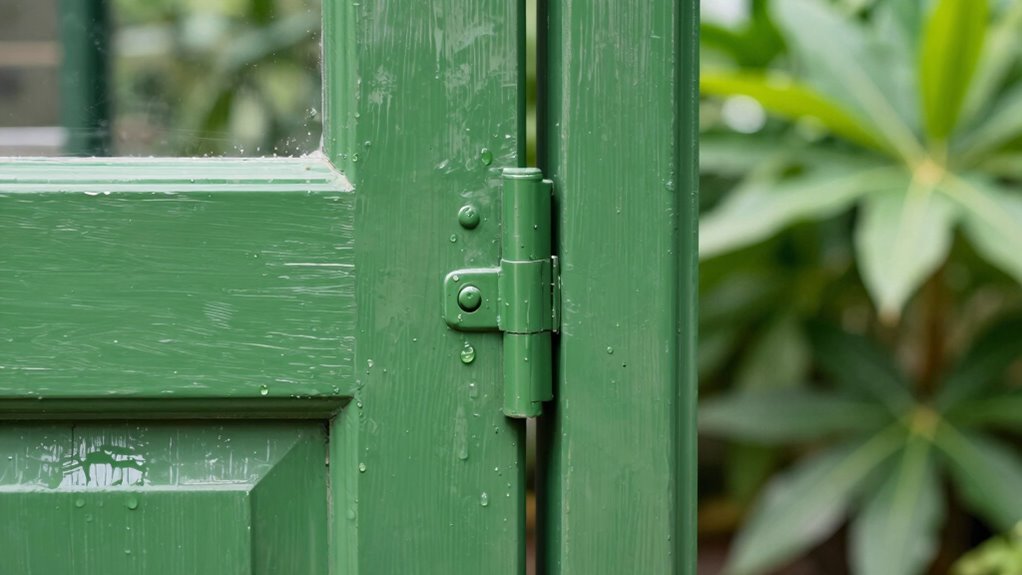
Ever notice how a fresh coat of paint can instantly revive a worn or chipped door? A quick paint touch-up can make your door look brand new and enhance its overall door aesthetics. Start by cleaning the surface to remove dust and grease. Use a small brush or foam applicator for precise touch-ups on chipped or faded spots. Match the paint color carefully to guarantee a seamless blend. For larger areas, consider repainting the entire door for a uniform look. Remember, the goal is to refresh without overdoing it—so keep strokes smooth and even. This simple step not only improves the door’s appearance but also boosts your home’s overall charm. A little effort goes a long way in making your door feel fresh and inviting again.
Polished Hardware Finish
Have you noticed how dull or tarnished hardware can make an otherwise fresh door look outdated? To restore its original shine, start with a good hardware polish. Use a soft cloth and a quality finish restoration product to buff away grime and tarnish. This simple step brings back the hardware’s luster and makes the entire door look refreshed. For stubborn spots, apply a bit more polish and gently scrub. After polishing, wipe away any residue and buff to a smooth finish. Not only does this improve the appearance, but it also helps protect the hardware from future tarnishing. With a little effort, your door’s hardware will look like new, completing your quick and effective door makeover.
Refresh Your Home With a Quick, Greenhouse-Like Door Boost

A quick way to energize your home is by giving your doors a fresh, greenhouse-like boost. Imagine bright, inviting spaces where natural light filters through, creating a vibrant atmosphere. To achieve this, start by enhancing door insulation—adding weatherstripping or sealing gaps helps maintain consistent temperature and humidity levels, mimicking a greenhouse’s climate. Upgrading hinge materials, such as switching to stainless steel or brass, ensures smoother operation and durability, reducing squeaks and sticking. You might also consider repainting or adding glass panels to increase light flow. These simple updates make your doors feel more open and lively, transforming the entire room into a fresh, vibrant space. Your home will look brighter, feel more inviting, and emulate that lush, green greenhouse vibe effortlessly.
Troubleshooting Persistent Sticking: Next Steps and Tips

If your doors still stick despite recent updates, it’s time to identify the specific causes and try targeted solutions. First, check hinge lubrication—sometimes, a simple application of oil or spray lubricant can diminish friction. If that doesn’t work, examine door alignment: uneven hinges or warping can cause sticking. Adjust the hinges to ensure the door sits evenly in the frame. Use a level to confirm proper alignment, and tighten or replace screws if needed. Also, inspect for any warping or swelling caused by humidity. If the door still sticks after these steps, consider minor sanding along the edges for a smoother fit. Addressing hinge lubrication and door alignment precisely will help resolve persistent sticking and restore smooth operation.
Frequently Asked Questions
Can Sticky Hinges Cause Door Damage Over Time?
Yes, sticky hinges can cause door damage over time. When hinges squeak or become sticky, they often lead to door misalignment, putting extra stress on the frame and hinges themselves. This strain can cause the door to warp or the hinges to loosen, eventually leading to more significant damage. Regularly lubricating hinges and fixing sticking issues early prevents these problems and keeps your door functioning smoothly.
How Often Should Hinges Be Lubricated for Best Results?
Did you know that regular hinge maintenance can extend their lifespan by up to 50%? For best results, you should lubricate your hinges every six months. Following a consistent lubrication schedule prevents squeaks, reduces wear, and keeps your doors swinging smoothly. If you notice squeaking or stiffness sooner, don’t wait—apply lubricant immediately. Staying on top of hinge maintenance guarantees your doors stay functional and quiet for years to come.
Are There Eco-Friendly Lubricants Suitable for Door Hinges?
Yes, you can use eco-friendly lubricants like biodegradable lubricants or plant-based oils for door hinges. These options are safe for the environment and effective at reducing squeaks and sticking. Just apply a small amount to the hinges, and you’ll notice smoother operation without harming your surroundings. Switching to plant-based oils or biodegradable lubricants is a simple, sustainable way to keep your hinges functioning well.
What Signs Indicate Hinges Need Replacing Rather Than Fixing?
Did you know that over 60% of door issues stem from worn hinges? If your door misaligns repeatedly, squeaks persist despite lubrication, or the hinge material shows rust or corrosion, it’s time to substitute. These signs indicate the hinge can’t be fixed through simple adjustments, especially if door alignment remains problematic. Replacing hinges ensures smoother operation and better durability, saving you future repairs.
Can DIY Hinge Repairs Improve Home Energy Efficiency?
Yes, DIY hinge repairs can boost your home’s energy efficiency. When you fix sticking or loose hinges, you help your doors close more tightly, improving door insulation and preventing drafts. This reduces heat loss in winter and keeps your home cooler in summer. By ensuring your doors seal properly, you cut down on energy costs and make your home more comfortable without needing professional help.
Conclusion
With just a quick five-minute fix, your door can glide smoothly again, transforming your space like a burst of fresh green growth. Regular maintenance is your best defense against stubborn sticking, keeping your hinges healthy and your home feeling new. Think of your hinges as the heartbeat of your door—when they’re well cared for, everything flows seamlessly. So don’t wait—give your doors the attention they deserve and enjoy hassle-free entries every day.