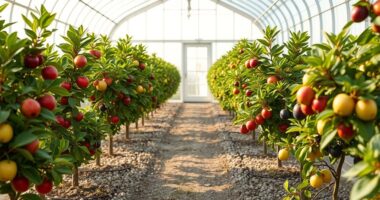

Growing microgreens in your greenhouse gives you the advantage of year-round cultivation, free from weather issues. You can control the environment to ensure consistent growth and quality, while also protecting your greens from pests and diseases. Select the right varieties for your seasons, gather the essential supplies, and prepare your growing medium for optimal results. If you want to maximize your yield and learn more about the process, keep exploring the next steps!
Key Takeaways
- Microgreens can be grown year-round in a greenhouse, avoiding external weather issues and ensuring consistent quality.
- Choose suitable varieties based on season and market demand, such as arugula and broccoli for popular options.
- Use shallow trays with drainage holes and a light, porous growing medium like coco coir for optimal growth.
- Maintain greenhouse temperatures between 60-70°F and humidity levels around 40-70% for healthy microgreen development.
- Harvest microgreens when they reach 1-3 inches in height, ensuring proper storage to maintain freshness.

Hlite 16inch 4 Pack LED Grow Lights - Linkable Grow Lights for Indoor Plants, Full Spectrum Plant Lights Plug and Hanging Design with On/Off Switch Hanging Grow Light from Seedling to Flowering, Pink
[Full Spectrum]:This high-quality hanging grow light brings the wonders of natural sunlight indoors. Its full spectrum LED lighting...
As an affiliate, we earn on qualifying purchases.
Benefits of Growing Microgreens in a Greenhouse

When you grow microgreens in a greenhouse, you unlock a host of benefits that make the process both efficient and rewarding. You can cultivate these greens year-round, sidestepping the limitations of external weather.
The controlled environment ensures consistent growth and quality while protecting your crops from pests and diseases, cutting down on pesticide use. With optimized light conditions, including supplemental lighting, your microgreens thrive, enhancing their nutrient density.
Additionally, using advanced materials can boost your crop yield by up to 40%, while reducing growth cycles by 20%. This means better flavor, color, and resilience in your harvest. Furthermore, backyard greenhouses allow you to maximize productivity and enjoy fresh microgreens all year long.
GROWATT HELIOS 3600 Portable Power Station, 3600Wh LFP Battery, Expandable to 240V/7200W AC Output, Up to 36kWh, Solar Electric Generator for Whole House Backup, RVs, Emergencies
【Emergency Electric Generator with Extended Runtime】3600W output and 3600Wh (3.6kWh) LFP battery, providing up to 15 hours of...
As an affiliate, we earn on qualifying purchases.
Choosing the Right Microgreens for Your Greenhouse

Selecting the right microgreens for your greenhouse can significantly impact your success as a grower. Consider seasonal varieties to maximize yield; for spring and summer, try sunflower, basil, or mustard greens, while kale and radish work well in fall and winter.
Year-round staples like pea shoots and arugula adapt to various conditions, ensuring you have consistent options. Pay attention to market demand too—popular choices include arugula and broccoli, which are favored by restaurants and consumers alike.
Assess your greenhouse environment, keeping temperatures between 60 to 70°F and humidity levels around 40% to 70%. With the right selection and understanding of conditions, you’ll cultivate thriving microgreens that meet both your needs and those of your customers.

FREELICHT 2 Pack 4FT LED Grow Light, 40W (250W Equivalent), Full Spectrum Sunlight Growing Lamp Fixture, Linkable Hanging Plant Light for Hydroponic Indoor Plants Seeding, Plug-in with On/Off Switch
Sunlike Full Spectrum: FREELICHT full spectrum grow lights simulate the natural sunlight, providing the ideal light conditions for...
As an affiliate, we earn on qualifying purchases.
Essential Supplies for Growing Microgreens

After you’ve chosen the right microgreens for your greenhouse, gathering the necessary supplies is the next step to ensure successful growth.
You’ll need trays with drainage holes to prevent waterlogging, paired with shallow, reusable trays for easy management.
Consider adding artificial light sources, like grow lights, since microgreens need 12-14 hours of light daily.
Don’t forget watering tools, such as sprayers and watering cans, to maintain moisture levels between 40% and 70%.
For efficient planting, grab hand rakes or small hoes, and keep plant labels handy to identify varieties.
Lastly, ensure air circulation with fans to prevent disease.
With these essentials, you’re well on your way to growing vibrant microgreens!

Barrina Plant Grow Lights, 4FT 5000K Full Spectrum Daylight White, 252W(6 x 42W, 1400W Equivalent), T8 LED Grow Light Strips, Growing Lamp Fixture, Plant Lights for Indoor Plants, Greenhouse, 6-Pack
Please note that we have a brand new upgrade.This product is compatible with Barrina GM Series Cords. If...
As an affiliate, we earn on qualifying purchases.
Preparing the Growing Medium

To grow healthy microgreens, it’s crucial to prepare the right growing medium. Start by choosing a light and porous medium, like coco coir or soilless mixes, ensuring it’s pathogen-free and clean.
Fill your trays with 1-2 inches of this medium, spreading it evenly to promote uniform growth. Before planting, moisten the medium evenly to prevent dry spots.
Make sure your trays have drainage holes to avoid waterlogging, which can harm your microgreens. If you want to use vermiculite, it can help retain moisture without causing splashing.
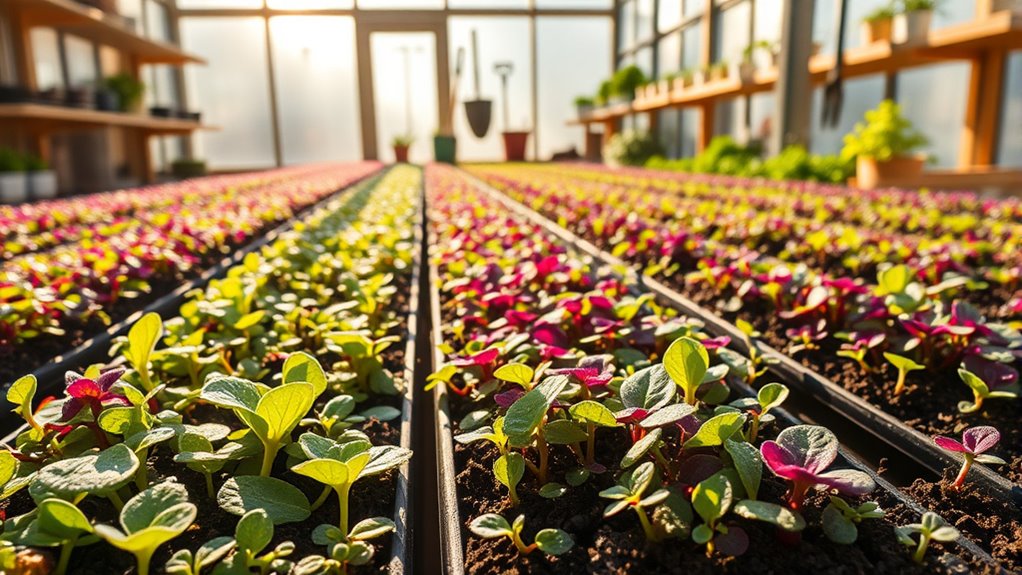
Sowing and Germinating Microgreens

When you’re ready to sow your microgreens, it’s important to choose the right seeds and ensure proper techniques for planting. Popular varieties like arugula, broccoli, kale, and radish work well.
For a standard tray, use about 10-15 grams of seed, spreading them evenly across the soil surface. Lightly press the seeds into the soil, but don’t bury them, as they need light to germinate.
Maintain an ideal temperature of 60-75°F for soil and 60-70°F for air. Covering the trays helps retain humidity, promoting germination, which usually happens within 3-5 days.
Keep the soil moist but not waterlogged, and ensure good air circulation to prevent mold and diseases. This will set you up for successful growth!
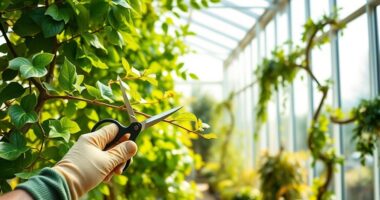
Harvesting and Maintaining Microgreens

Once your microgreens have germinated and grown strong, it’s time to think about harvesting and maintaining their quality.
Harvest them when they reach 1-3 inches in height, depending on the variety. Use clean, sharp scissors or a knife to cut the stems just above the growing medium, ensuring you don’t damage the roots. Look for fully expanded true leaves as a readiness sign.
Harvest microgreens when they reach 1-3 inches, using clean scissors to cut above the roots, ensuring true leaves are fully expanded.
Store your harvested microgreens in a sealed container with a damp paper towel to keep them fresh.
Maintain humidity levels between 40% and 70%, provide about 12 hours of light daily, and ensure good air circulation. Control temperature for consistent growth, and avoid overcrowding to prevent mold.
Enjoy your fresh, vibrant microgreens!
Frequently Asked Questions
How Long Does It Take for Microgreens to Grow?
Microgreens usually take between seven to 21 days to grow from seeding to harvest, depending on the type and conditions.
You’ll want to keep soil temperatures between 60 to 75°F and air temperatures around 60 to 70°F for optimal growth.
Light exposure plays a significant role, so more light can speed up growth.
Consistent watering and maintaining humidity levels between 40% to 70% are also crucial for healthy microgreens.
Can Microgreens Be Grown Without a Greenhouse?
Absolutely, you can grow microgreens without a greenhouse!
In fact, many people successfully cultivate them indoors using grow lights or natural sunlight.
With soilless methods like hydroponics or growing mats, you’ll save space and reduce water usage.
Plus, you’ll enjoy the satisfaction of harvesting fresh greens year-round.
It’s a flexible, cost-effective way to meet your culinary needs while ensuring a cleaner growing environment.
What Pests Commonly Affect Microgreens?
Common pests that affect microgreens include aphids, which distort leaves, and fungus gnats, known for damaging roots.
You’ll also encounter whiteflies, which can spread diseases, and spider mites that cause leaf discoloration.
Thrips can stunt growth by feeding on sap.
To protect your plants, keep the growing area clean, introduce beneficial insects, and monitor regularly for signs of infestations.
Taking these steps can help maintain healthy microgreens and prevent pest problems.
How Do I Store Harvested Microgreens?
Did you know fresh microgreens typically last up to a week when stored properly?
To store your harvested microgreens, keep them in a cool place, ideally in the refrigerator. Use plastic clamshells for short-term storage or resealable bags with a paper towel to absorb moisture.
Avoid washing them before storage to prevent mold. For longer preservation, consider vacuum-sealing or freezing your microgreens, allowing you to enjoy their freshness later!
Are There Any Health Risks Associated With Microgreens?
Yes, there are health risks associated with microgreens. They can harbor pathogens like *Salmonella* and *E. coli*, especially if hygiene practices aren’t followed.
Some varieties contain high oxalate levels, which could lead to kidney stones, and their high fiber may cause digestive discomfort.
Vulnerable populations, such as pregnant women and the elderly, face greater risks. It’s crucial to handle, wash, and store them properly to minimize these health concerns.
Conclusion
As you nurture your microgreens, think of them as tiny warriors, bravely pushing through the soil in search of sunlight. Each vibrant leaf symbolizes your dedication and care, transforming your greenhouse into a refuge of life. With every harvest, you’re not just gathering greens; you’re reaping the rewards of patience and perseverance. Embrace this journey, for in these small plants, you’ll find the seeds of joy and fulfillment blossoming in your hands.